
BUILDING FIBERGLASS OUTBOARD BRACKET
3 posters
Page 1 of 1

BUILDING FIBERGLASS OUTBOARD BRACKET
![]() by DAYTRIP Thu Jul 02, 2015 12:44 pm
by DAYTRIP Thu Jul 02, 2015 12:44 pm
I recently bought a 28 Bertram with the intent of installing a pair of 250 Yamahas on it. I wanted to either hang the engines on the transom as the boat in the first picture did or hang them on a bracket as the boat in the second photo did. Either configuration required transom work. I decided to do the bracket in order to retain cockpit space but I will say I prefer the look of the engines on the transom.
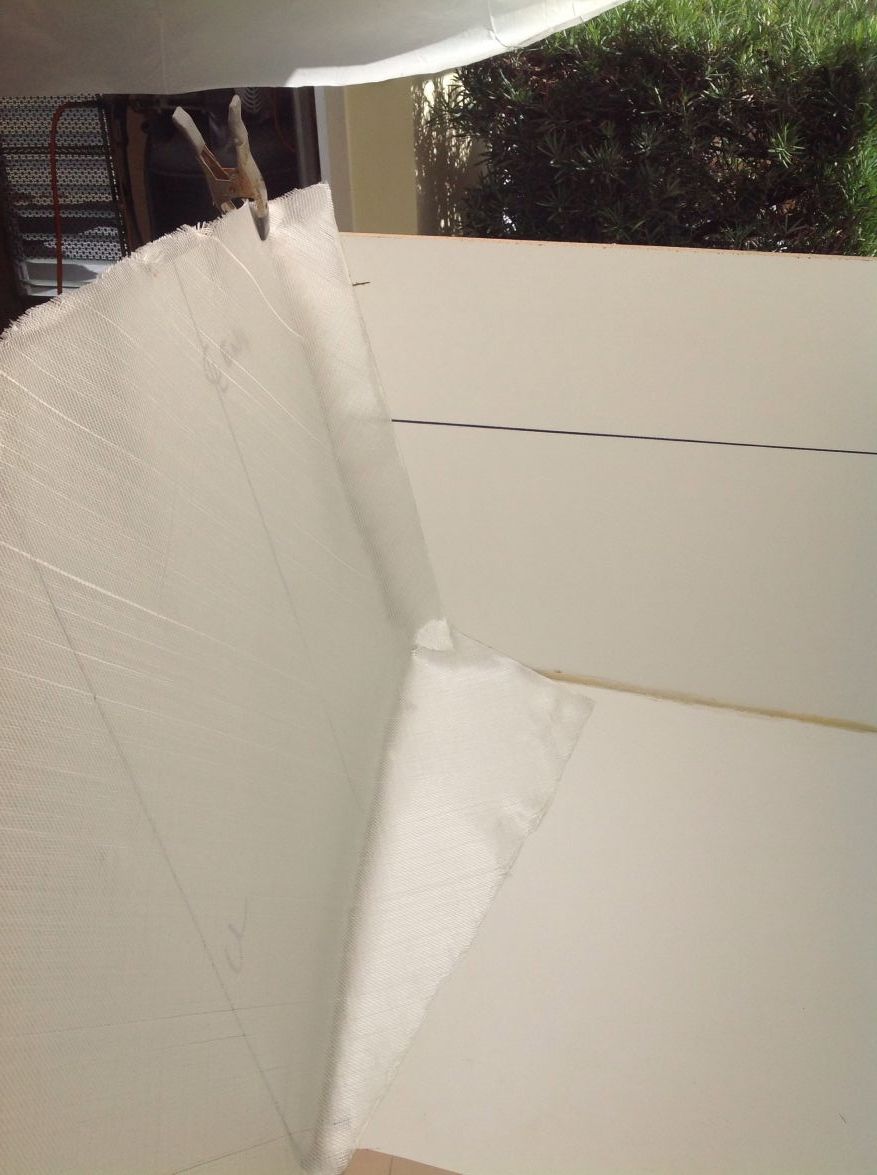
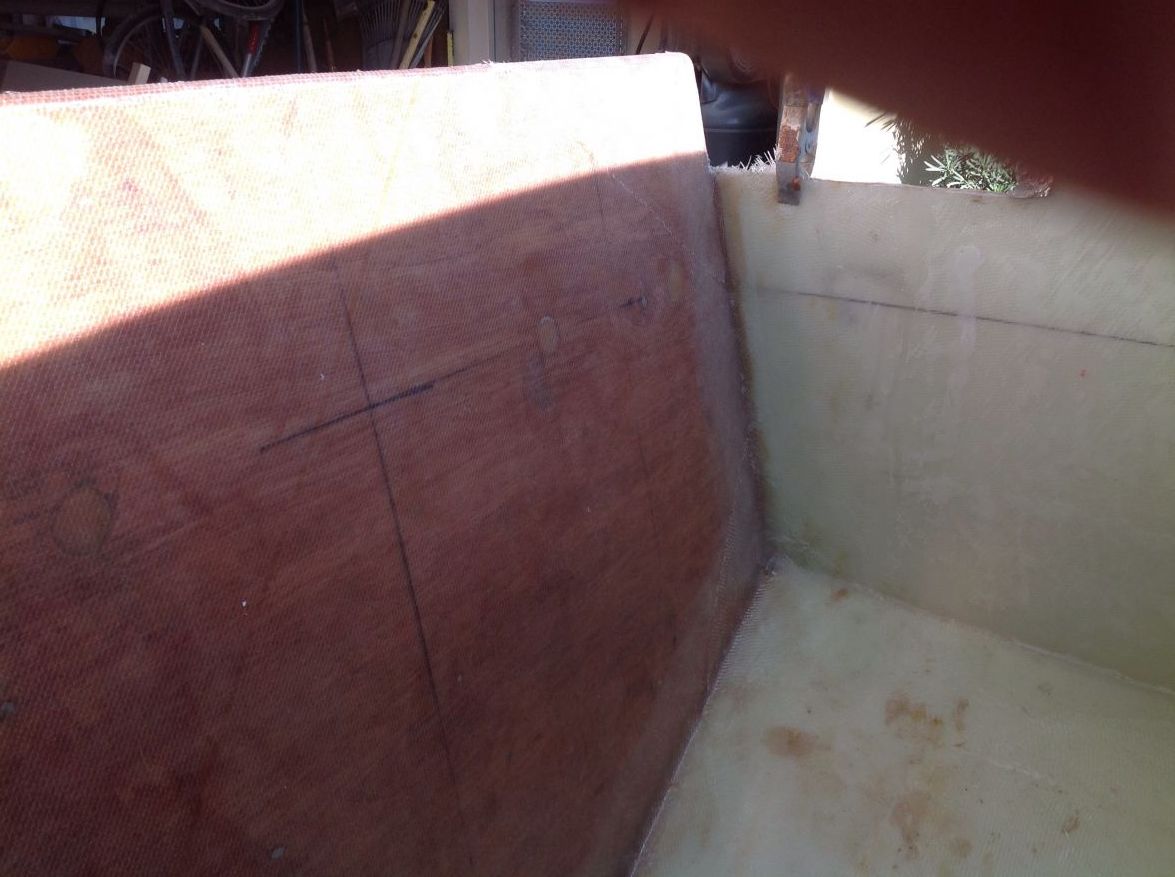
My first task was to reinforce the transom. I removed all old parts and pieces and ground the glass to expose clean glass. My first task was to add two skins of 1700 biax. All laminating and glue work was done with epoxy that Joel sells on this site.

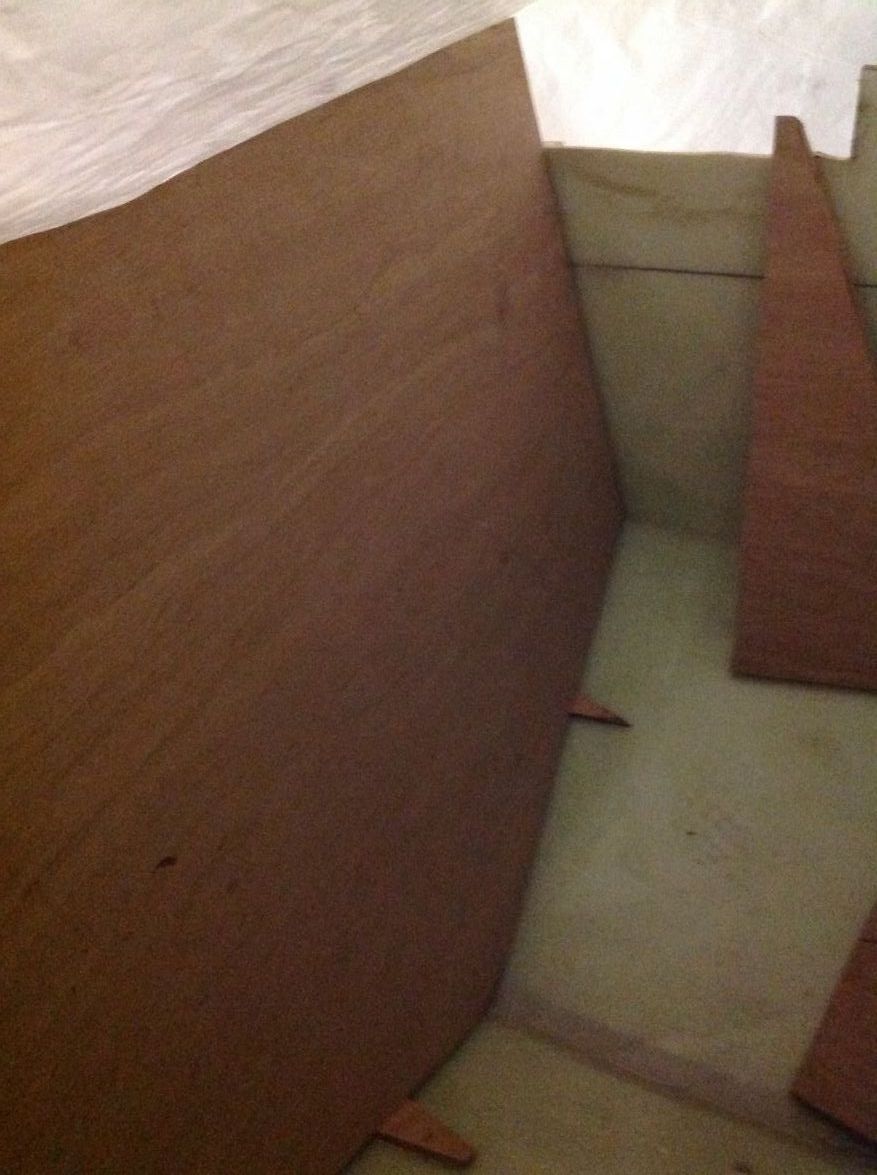
On these boats the transom is curved both top to bottom and side to side so I utilizes 3/8" thick plywood (meranti) cut into 12" strips in order to allow for conformance to the compound curve. To bond the plywood to the transom glass I used a mixture of wood flour and epoxy resin. I use a notched trowel that is used to spread thin set mud (tile work) so that you achieve a even layer with room to squeeze down. I troweled both the transom side and the plywood. To hold it in place I use drywall screws through the transom as I will be doing glass and body work back there anyway. Once secured I used a vacuum bag method to pull the plywood tight to the transom. You can use screws to pull it down but if you know how to vacuum it I think you get a more even pull down force. In this pic you can see the core bagged and under vacuum. After the first piece of plywood (3/8" thick) was on and cured added two layers as outlined above, vacuumed it down, then repeated it until I had five layers. I alternated the direction of the grain to get a good distribution of strength.

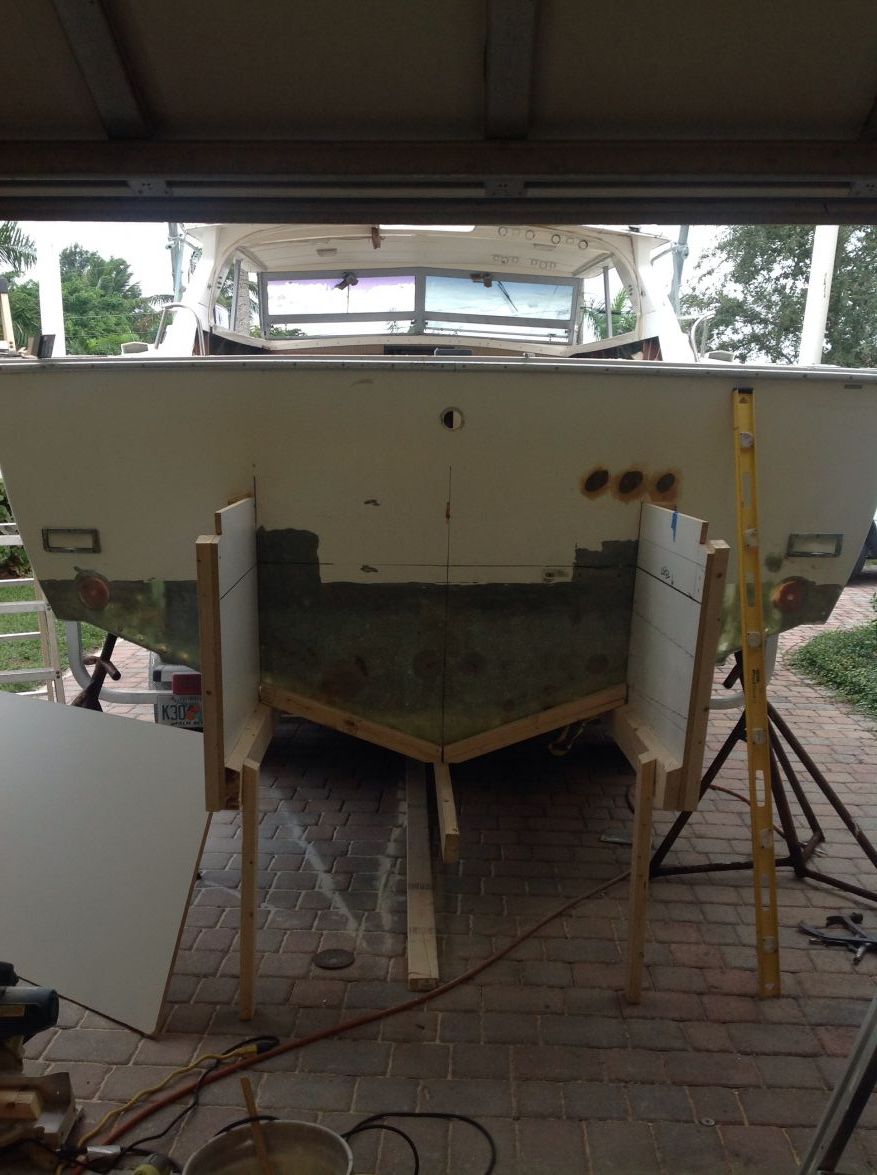
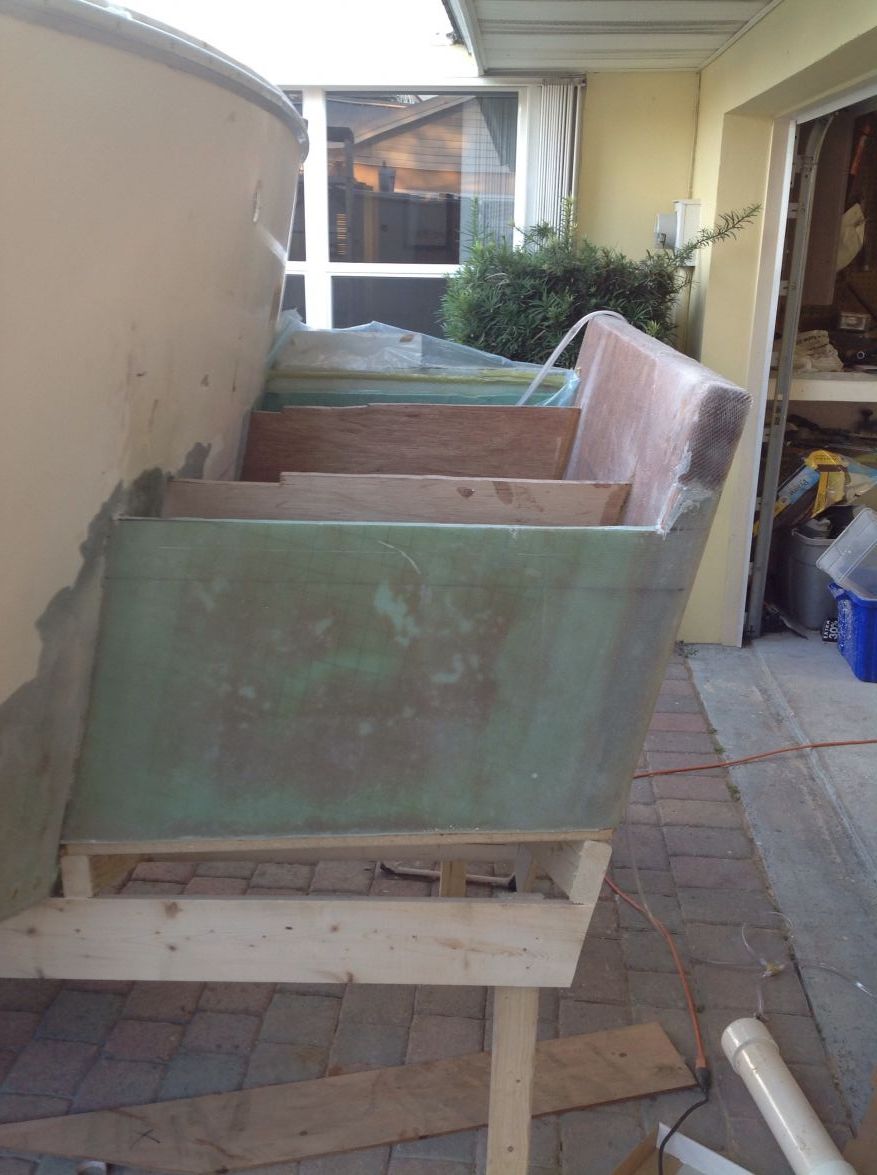
I choose to build the bracket directly on the boat in order to avoid 150 bolts going through the transom. Clearly someone else will own this boat if that bracket needs to come off My first task was to build a mold on the back of the boat that would define the shape of the bracket. I straightened two 2x6s and beveled the top edge to allow them to set vertical against the bottom of the hull. I decided to have the bracket set the engines back 30" from the transom so the 2x extended back 30" from the transom. I mitered the end of the 2x6s to match the angle of the transom. I would later use that face to mount the back portion of the mold. I made the "tub" of the bracket 48" wide which seems typical to other manufactured brackets. It allows the 250s to mount on 28.5" centers in accordance with Yamaha's specified spread. I had one 2x on centerline which would help set the angle on the bottom of the bracket and support the two bottom mold pieces.

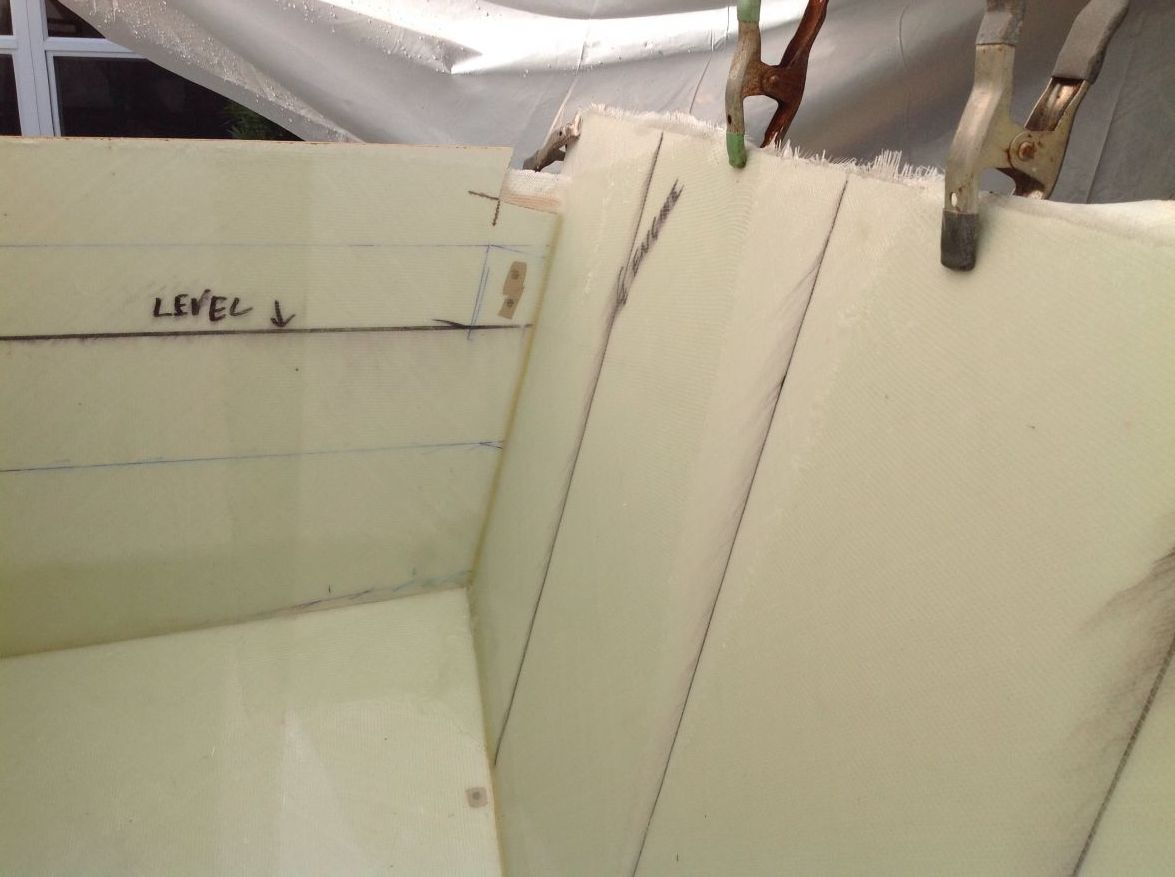
Once the supports were installed I installed the side pieces of the mold. The molding surfaces are all melamine which is partical board that has a plastic/vinyl coating on each side. It is used to build cabinet boxes typically. Glass releases off it very well. A couple coats of wax and it is good to go. The edge butting the transom hade to be scribed to match the vertical cambered shape. The back edge cut to match the angle of the transom which is about 12 degrees. I did not angle these pieces out to provide relief as they are screwed in and will be unscrewed to remove them post cure.
I next installed a 2x that was cut to provide a 1" in 12" upward slope for the bottom of the bracket. It also provide a 3" step up so the bracket is not a running surface.
The next step was to install the aft face of the mold which is the engine mounting face. I figured the top of this piece to equal the mounting height of the engines. So using a a 1 in 12 rise the cavitation plate should be 2.5" above the bottom on the hull for a 30" set back. That being said the top edge of the mold is 32.5 " above the bottom of the hull for 30" shaft motors. I added some 2x stiffeners to the outside faces to hold everything flat. I also added legs to the bottom on the mold supports to prevent sagging.
Now that the mold is together I added wax filets in the corners to allow the glass to bend on a smooth radius. I used 3/8". You can also use clay to do this and it works just fine also. Once this was done I was ready to start laying up. I used all 1700 as it was what I had. I would have built thickness much faster with 1708! Anyway I did 10 plys on the transom and bottom and eight on the sides.
Next I added the core to the clamping section for the motors. I went back and forth between using plywood or foam and landed on plywood. The entire boat has wood core so why spend the cost and plywood is easier to work with. I made the core with three layers of 3/4" metranti. Used the same process as I did on the interior less the vacuum. Due to the way the mold was built I couldn't get a vacuum seal. I can explain if someone wants to know. I wound up doing one layer at a time and used screws to secure/clamp each layer to the previous. I did core the sides with foam to add some stiffness. Had the foam so I used it. Plywood would have been fine. I designed the bracket completely around the stringers and clamping boards having capacity to carry the applied loads. So with that in mind the balance of the bracket structure is redundant and/or there to enclose the structure and add buoyancy. That is the theory the loads I figured are 3500lbs of thrust and 6g of vertical force or 6x engine weight = 7200lbs. Found those assumptions from some internet data. Hope it is right!
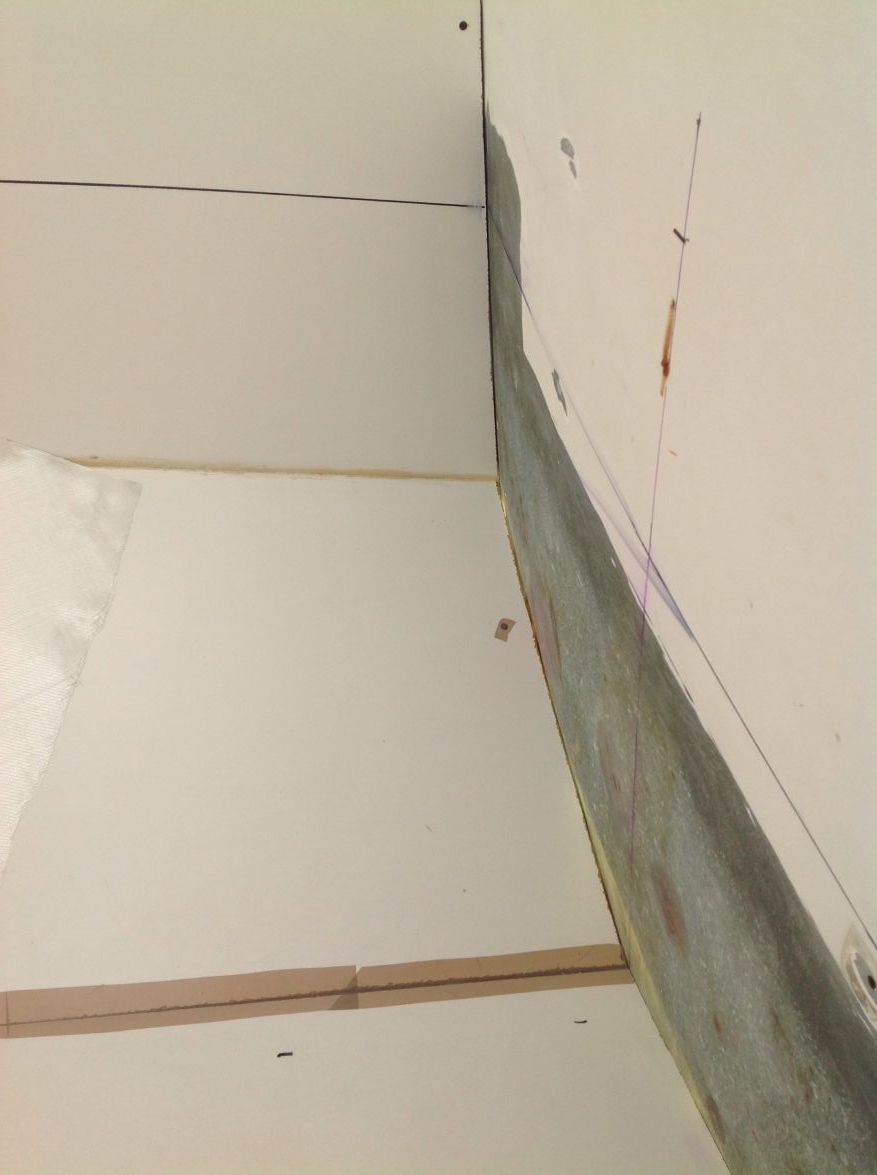
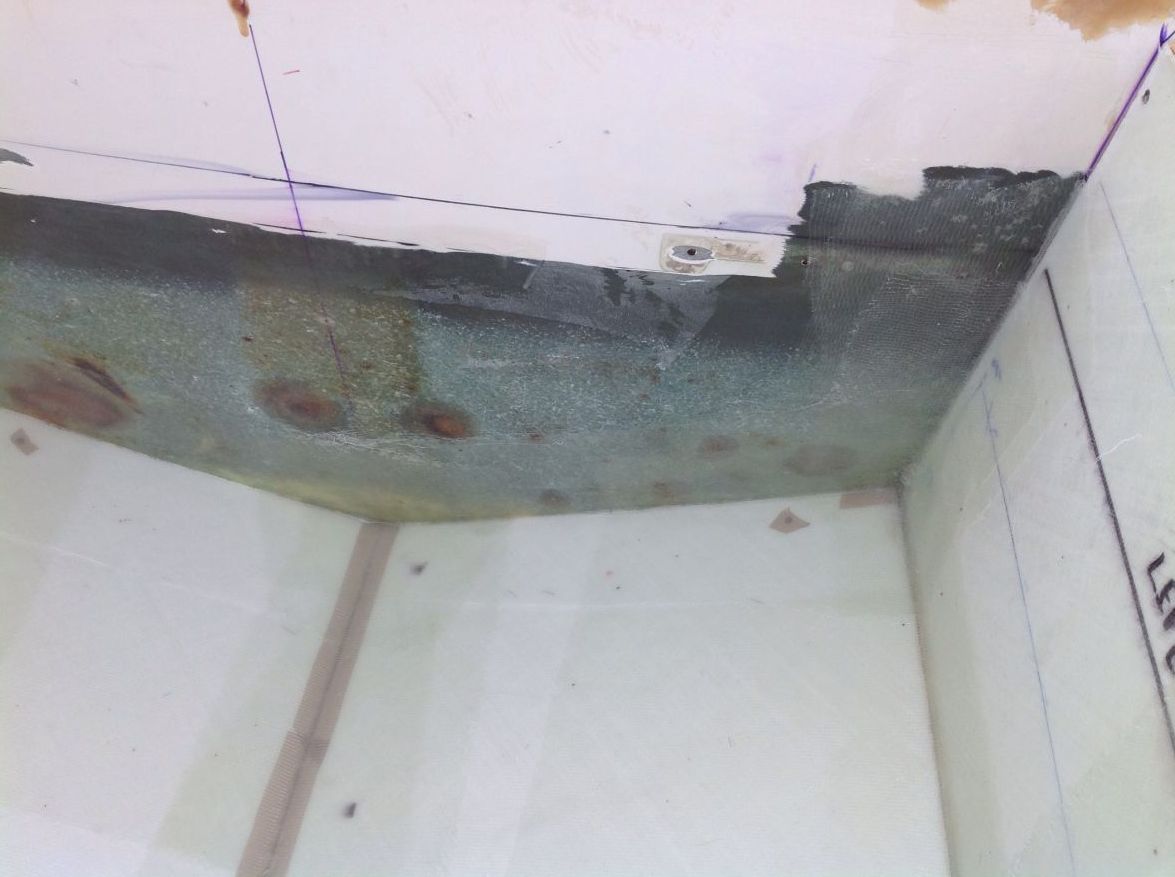
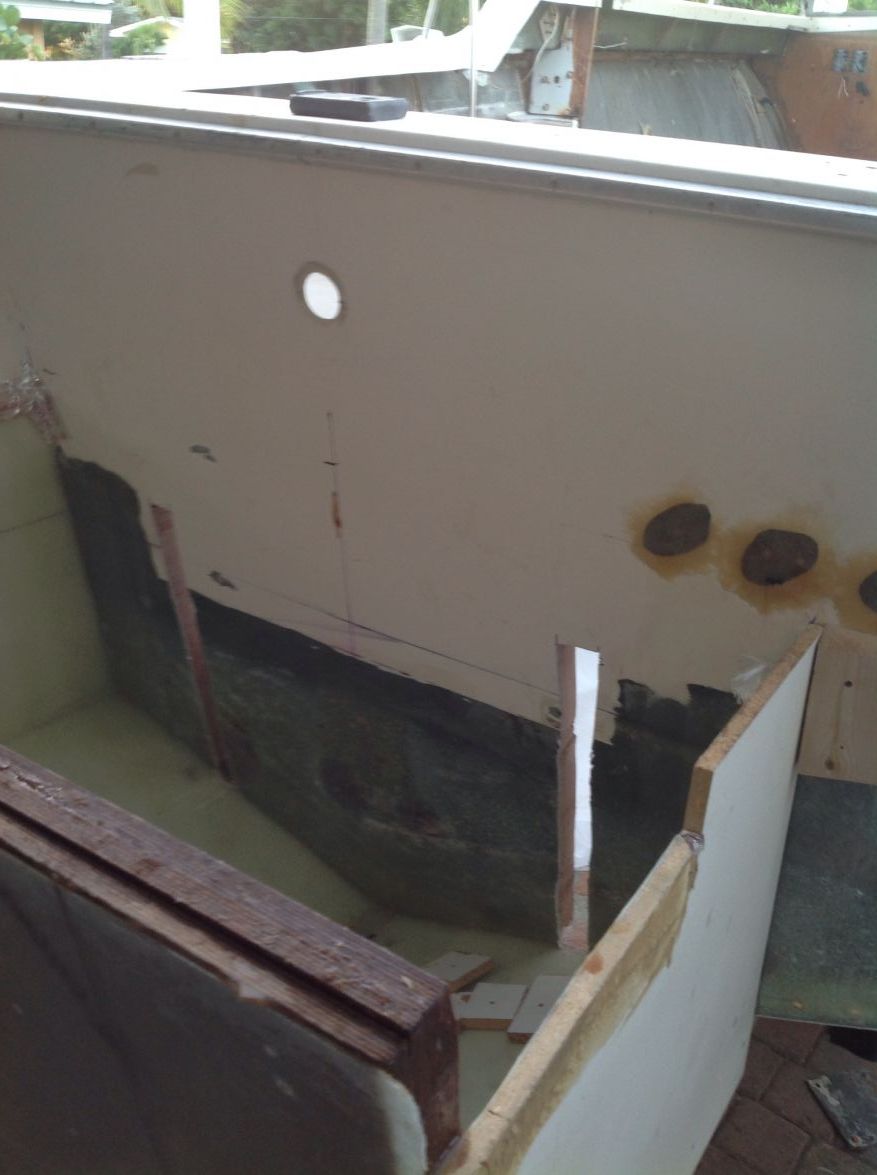
To transfer the loads to the hull I extended the stringers through the transom to the clamping board of the bracket. Essentially what I did was add 3/4 in ply on the top of the existing center stringers and carried them straight back. The stringer extension ties to the bottom and clamping board of the bracket. Between the clamping board and transom I doubled the extensions by gluing a second piece of 3/4 to them. Redundant but thought it would transfer loads to transom if need be. As Joel told me I will appreciate redundancy when I am off shore. I gassed the stringers with 4 layers on each side. They tab to the transom and clamping boards both. Each joint is fileted with epoxy and wood flour before glassing so that glass rounds the corner smoothly and transfers loads.
More to come including photos.
My first task was to reinforce the transom. I removed all old parts and pieces and ground the glass to expose clean glass. My first task was to add two skins of 1700 biax. All laminating and glue work was done with epoxy that Joel sells on this site.
On these boats the transom is curved both top to bottom and side to side so I utilizes 3/8" thick plywood (meranti) cut into 12" strips in order to allow for conformance to the compound curve. To bond the plywood to the transom glass I used a mixture of wood flour and epoxy resin. I use a notched trowel that is used to spread thin set mud (tile work) so that you achieve a even layer with room to squeeze down. I troweled both the transom side and the plywood. To hold it in place I use drywall screws through the transom as I will be doing glass and body work back there anyway. Once secured I used a vacuum bag method to pull the plywood tight to the transom. You can use screws to pull it down but if you know how to vacuum it I think you get a more even pull down force. In this pic you can see the core bagged and under vacuum. After the first piece of plywood (3/8" thick) was on and cured added two layers as outlined above, vacuumed it down, then repeated it until I had five layers. I alternated the direction of the grain to get a good distribution of strength.
I choose to build the bracket directly on the boat in order to avoid 150 bolts going through the transom. Clearly someone else will own this boat if that bracket needs to come off
My first task was to build a mold on the back of the boat that would define the shape of the bracket. I straightened two 2x6s and beveled the top edge to allow them to set vertical against the bottom of the hull. I decided to have the bracket set the engines back 30" from the transom so the 2x extended back 30" from the transom. I mitered the end of the 2x6s to match the angle of the transom. I would later use that face to mount the back portion of the mold. I made the "tub" of the bracket 48" wide which seems typical to other manufactured brackets. It allows the 250s to mount on 28.5" centers in accordance with Yamaha's specified spread. I had one 2x on centerline which would help set the angle on the bottom of the bracket and support the two bottom mold pieces.Once the supports were installed I installed the side pieces of the mold. The molding surfaces are all melamine which is partical board that has a plastic/vinyl coating on each side. It is used to build cabinet boxes typically. Glass releases off it very well. A couple coats of wax and it is good to go. The edge butting the transom hade to be scribed to match the vertical cambered shape. The back edge cut to match the angle of the transom which is about 12 degrees. I did not angle these pieces out to provide relief as they are screwed in and will be unscrewed to remove them post cure.
I next installed a 2x that was cut to provide a 1" in 12" upward slope for the bottom of the bracket. It also provide a 3" step up so the bracket is not a running surface.
The next step was to install the aft face of the mold which is the engine mounting face. I figured the top of this piece to equal the mounting height of the engines. So using a a 1 in 12 rise the cavitation plate should be 2.5" above the bottom on the hull for a 30" set back. That being said the top edge of the mold is 32.5 " above the bottom of the hull for 30" shaft motors. I added some 2x stiffeners to the outside faces to hold everything flat. I also added legs to the bottom on the mold supports to prevent sagging.
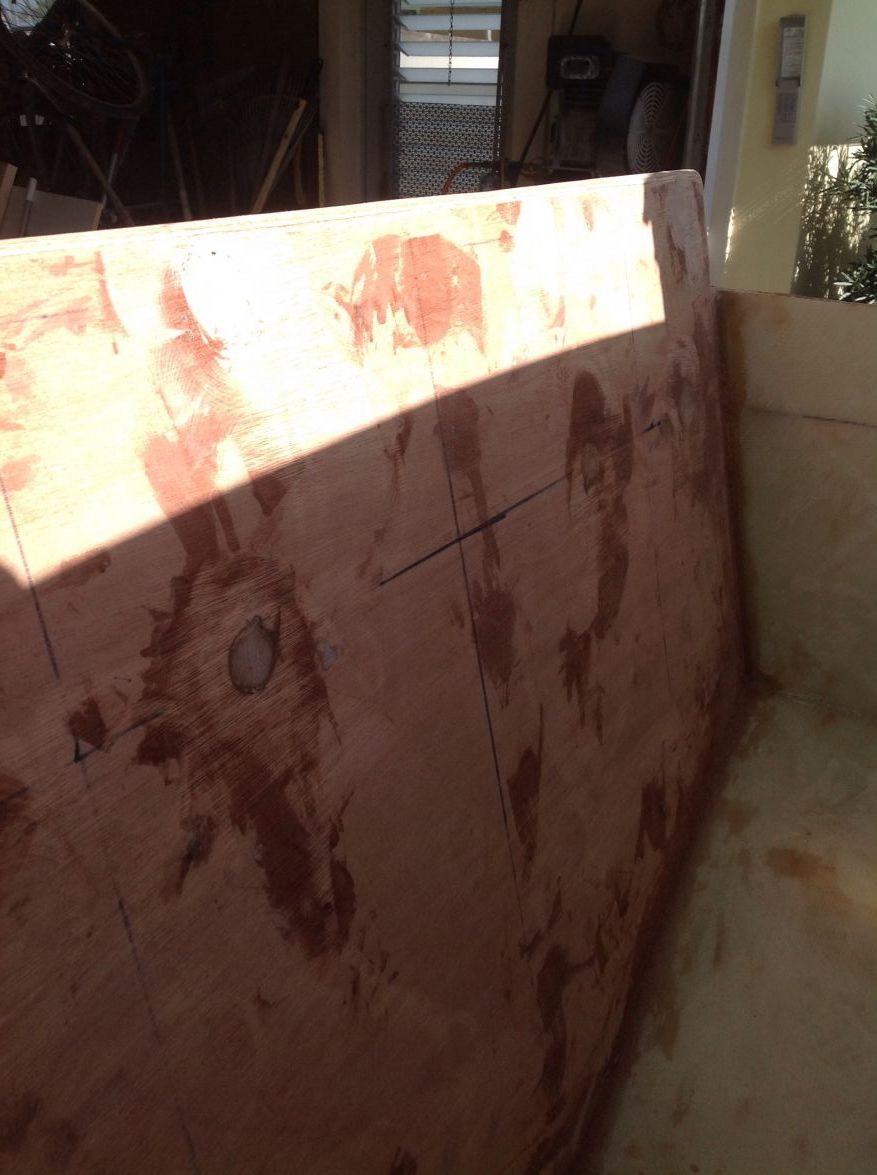
Now that the mold is together I added wax filets in the corners to allow the glass to bend on a smooth radius. I used 3/8". You can also use clay to do this and it works just fine also. Once this was done I was ready to start laying up. I used all 1700 as it was what I had. I would have built thickness much faster with 1708! Anyway I did 10 plys on the transom and bottom and eight on the sides.
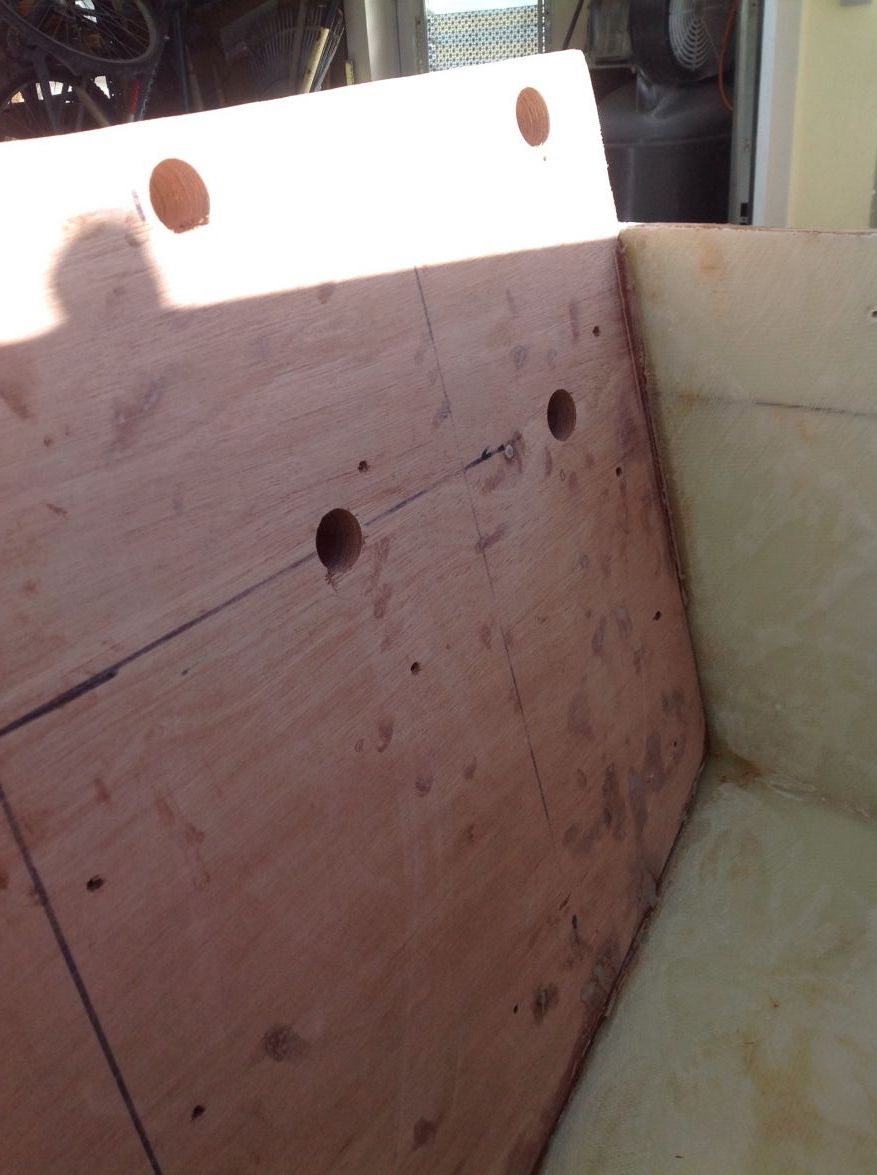
Next I added the core to the clamping section for the motors. I went back and forth between using plywood or foam and landed on plywood. The entire boat has wood core so why spend the cost and plywood is easier to work with. I made the core with three layers of 3/4" metranti. Used the same process as I did on the interior less the vacuum. Due to the way the mold was built I couldn't get a vacuum seal. I can explain if someone wants to know. I wound up doing one layer at a time and used screws to secure/clamp each layer to the previous. I did core the sides with foam to add some stiffness. Had the foam so I used it. Plywood would have been fine. I designed the bracket completely around the stringers and clamping boards having capacity to carry the applied loads. So with that in mind the balance of the bracket structure is redundant and/or there to enclose the structure and add buoyancy. That is the theory
To transfer the loads to the hull I extended the stringers through the transom to the clamping board of the bracket. Essentially what I did was add 3/4 in ply on the top of the existing center stringers and carried them straight back. The stringer extension ties to the bottom and clamping board of the bracket. Between the clamping board and transom I doubled the extensions by gluing a second piece of 3/4 to them. Redundant but thought it would transfer loads to transom if need be. As Joel told me I will appreciate redundancy when I am off shore. I gassed the stringers with 4 layers on each side. They tab to the transom and clamping boards both. Each joint is fileted with epoxy and wood flour before glassing so that glass rounds the corner smoothly and transfers loads.
More to come including photos.
DAYTRIP- Posts : 133
Join date : 2015-04-14
Re: BUILDING FIBERGLASS OUTBOARD BRACKET
![]() by DAYTRIP Thu Jul 23, 2015 1:08 pm
by DAYTRIP Thu Jul 23, 2015 1:08 pm
I then put malamine that I cut using a pattern made on autoCad. Did a lot of measuring to be sure I was semetric.
I set the boat level with the waterline using a water level which allowed me to make a level line so the platform will sit level with the water at rest. Plan on clawing the corners and starting to glass tomorrow.
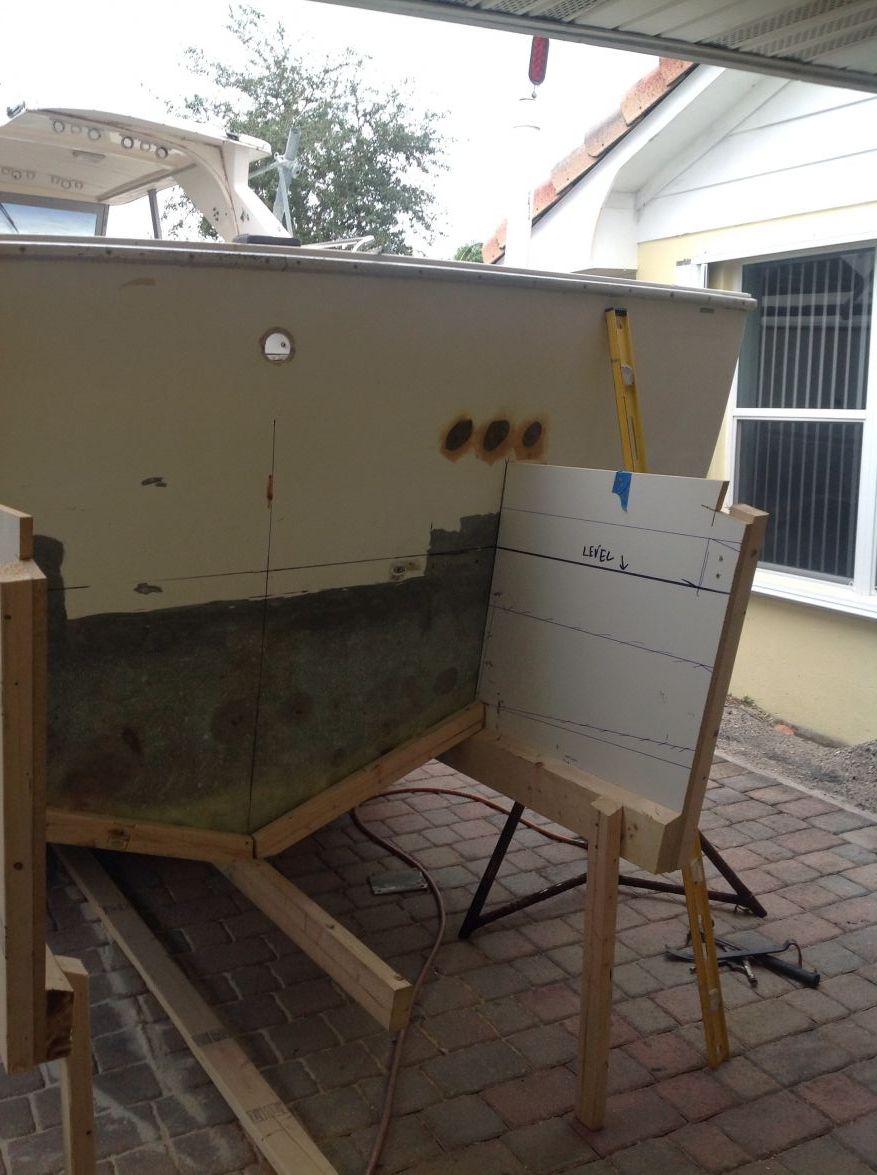
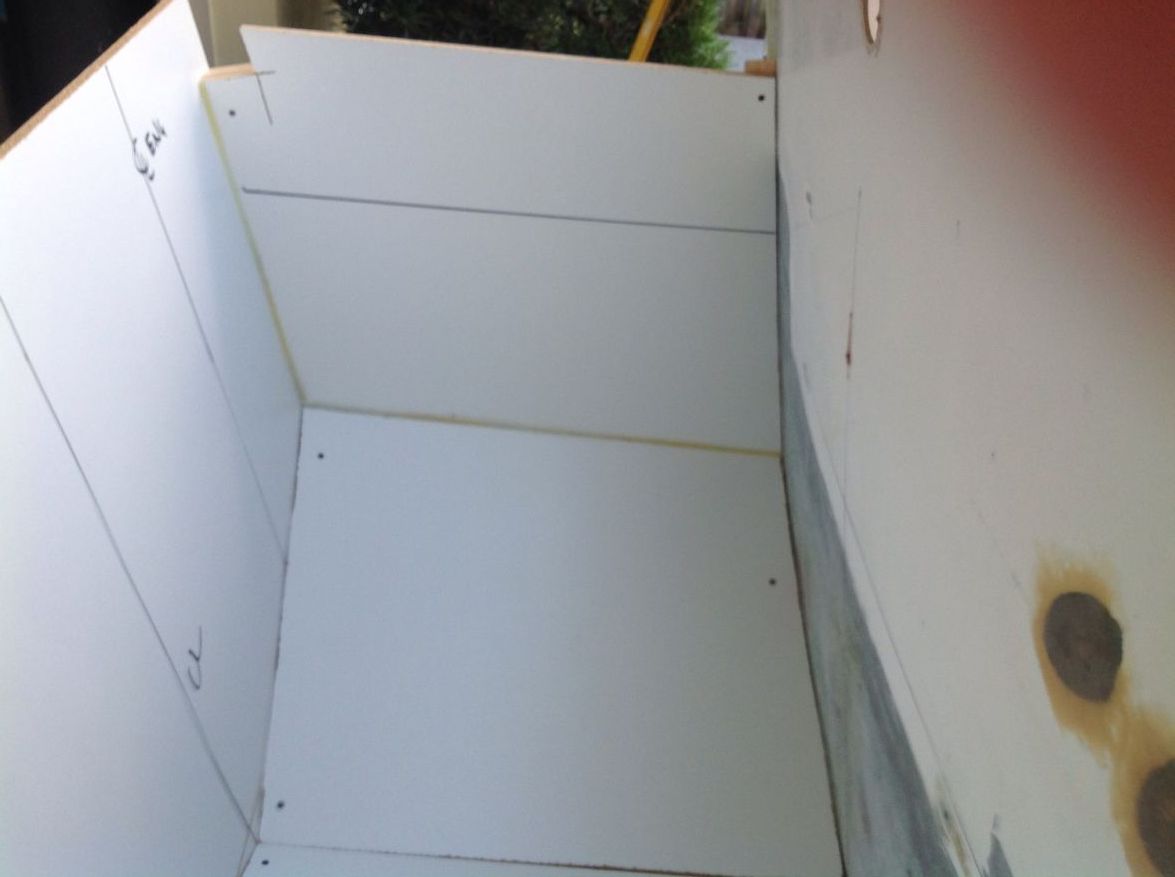
I then addressed the corners. Using wax fillets vs clay. A little cleaner. Sometimes hard to get them to stick but a quick pass with some heat usually does it
I set the boat level with the waterline using a water level which allowed me to make a level line so the platform will sit level with the water at rest. Plan on clawing the corners and starting to glass tomorrow.
I then addressed the corners. Using wax fillets vs clay. A little cleaner. Sometimes hard to get them to stick but a quick pass with some heat usually does it
Last edited by DAYTRIP on Thu Sep 24, 2015 7:53 pm; edited 2 times in total
DAYTRIP- Posts : 133
Join date : 2015-04-14
Re: BUILDING FIBERGLASS OUTBOARD BRACKET
![]() by Admin - Shine Mon Jul 27, 2015 9:10 am
by Admin - Shine Mon Jul 27, 2015 9:10 am
excellent Jim. Thanks for posting.
You put a lot of thought (and sweat) into this. Its going to be a very nice boat.
You put a lot of thought (and sweat) into this. Its going to be a very nice boat.

Admin - Shine- Admin
- Posts : 488
Join date : 2015-03-31 -

Re: BUILDING FIBERGLASS OUTBOARD BRACKET
![]() by DAYTRIP Thu Sep 24, 2015 9:14 pm
by DAYTRIP Thu Sep 24, 2015 9:14 pm
So to continue on, I layed up the bracket next. I used db 1700 that Joel sells here. I used 7 layers on the exterior skins. A laminent design book indicates each layer is .03 " so my total thickness is about 1/4 on the outside.
Once I did my exterior skins I started with my clamping boards. I used 3/4" meranti plywood glued together in three plys. To glue them together I mixed up wood flour to mayonnaise consistency and spread it using a notched spreader. To pull it together tight I used drywall screws on 12" centers. I did one ply at a time and let it kick before I did the next ply.
In order to protect the core from water damage I over the engine mounts from the inside with a 1.5" forgener bit.
Then I filled with epoxy and wood flour. I damed the putty with small pieces of malamine taped to the surface. Worked good. Some grinding required.
Then I tabled two layers of tape inside the corners and put two skins on. One thing that does not show is that I am turning every couple layers 45 degrees so I get glass on 0-45-90 orientations for strength.
Next I put the stringers in and bedded them in epoxy.
DAYTRIP- Posts : 133
Join date : 2015-04-14
rranger- Posts : 3
Join date : 2017-11-19
Re: BUILDING FIBERGLASS OUTBOARD BRACKET
![]() by DAYTRIP Sun Nov 19, 2017 8:08 pm
by DAYTRIP Sun Nov 19, 2017 8:08 pm
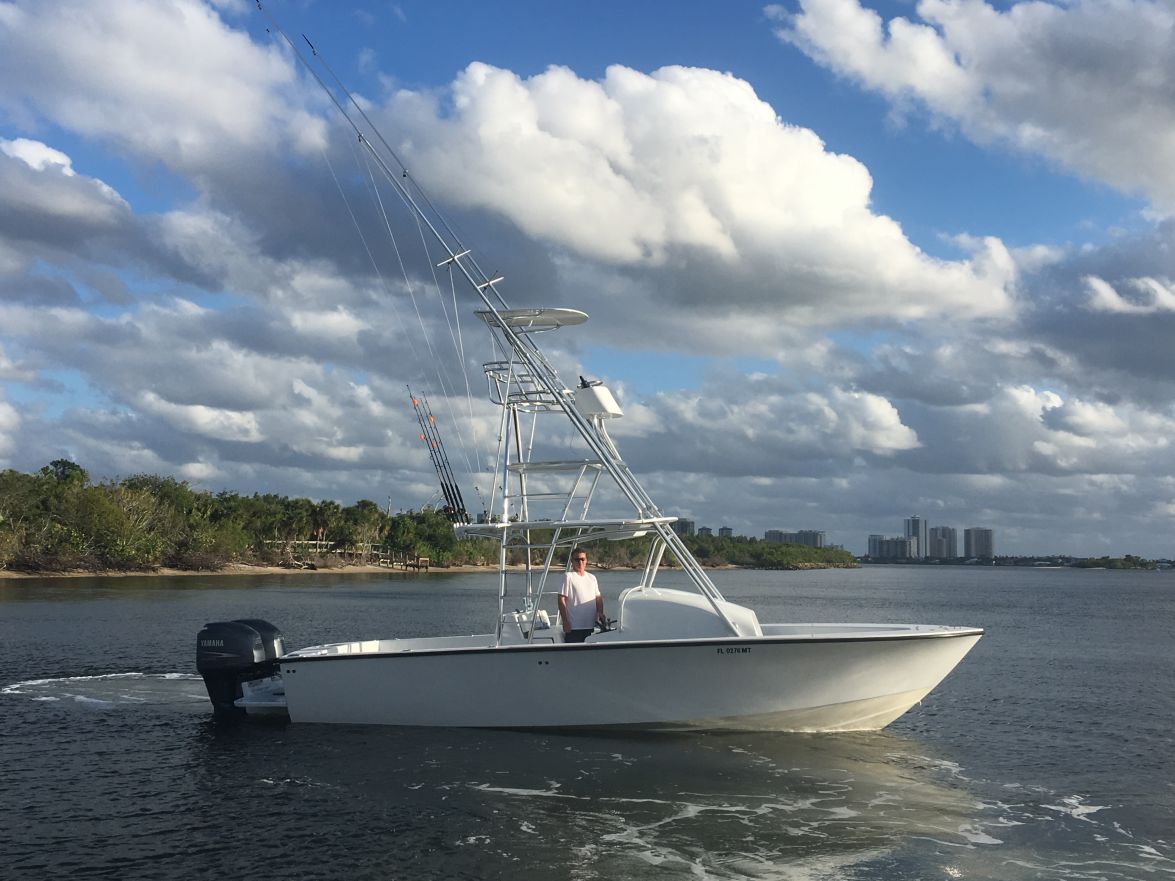
I sure did. Two 250 Yamahas are hanging on it
DAYTRIP- Posts : 133
Join date : 2015-04-14
Re: BUILDING FIBERGLASS OUTBOARD BRACKET
![]() by rranger Sun Nov 19, 2017 9:54 pm
by rranger Sun Nov 19, 2017 9:54 pm
Is there more to this thread somewhere?
rranger- Posts : 3
Join date : 2017-11-19
Re: BUILDING FIBERGLASS OUTBOARD BRACKET
![]() by DAYTRIP Mon Nov 20, 2017 6:58 pm
by DAYTRIP Mon Nov 20, 2017 6:58 pm
This is the finished product
There is a full thread on it if you search “bertram outboard “ on google
There is a full thread on it if you search “bertram outboard “ on google
DAYTRIP- Posts : 133
Join date : 2015-04-14
» building a fiberglass outboard bracket
» making fiberglass stringers (forms)
» Building laminated stringers from 4'x8' plywood or core
» Free expert technical help for your boat building project
» Refinish a Fiberglass Shower
» making fiberglass stringers (forms)
» Building laminated stringers from 4'x8' plywood or core
» Free expert technical help for your boat building project
» Refinish a Fiberglass Shower
Page 1 of 1
Permissions in this forum:
You cannot reply to topics in this forum