
BERTRAM 28 CENTER CONSOLE CONVERSION
Page 4 of 5 •  1, 2, 3, 4, 5
 ![]()
Re: BERTRAM 28 CENTER CONSOLE CONVERSION
![]() by DAYTRIP Mon Oct 26, 2015 7:45 pm
by DAYTRIP Mon Oct 26, 2015 7:45 pm
DAYTRIP- Posts : 133
Join date : 2015-04-14
Re: BERTRAM 28 CENTER CONSOLE CONVERSION
![]() by Admin - Shine Tue Oct 27, 2015 7:18 am
by Admin - Shine Tue Oct 27, 2015 7:18 am

Admin - Shine- Admin
- Posts : 488
Join date : 2015-03-31 -

Re: BERTRAM 28 CENTER CONSOLE CONVERSION
![]() by DAYTRIP Tue Oct 27, 2015 7:40 pm
by DAYTRIP Tue Oct 27, 2015 7:40 pm
DAYTRIP- Posts : 133
Join date : 2015-04-14
Re: BERTRAM 28 CENTER CONSOLE CONVERSION
![]() by Admin - Shine Wed Oct 28, 2015 7:24 am
by Admin - Shine Wed Oct 28, 2015 7:24 am
Admin - Shine- Admin
- Posts : 488
Join date : 2015-03-31 -
Re: BERTRAM 28 CENTER CONSOLE CONVERSION
![]() by lawtoolguy Wed Oct 28, 2015 12:00 pm
by lawtoolguy Wed Oct 28, 2015 12:00 pm
How about a hatch under the seat for quick access to below?
lawtoolguy- Posts : 27
Join date : 2015-04-14
Re: BERTRAM 28 CENTER CONSOLE CONVERSION
![]() by DAYTRIP Mon Nov 02, 2015 8:55 am
by DAYTRIP Mon Nov 02, 2015 8:55 am
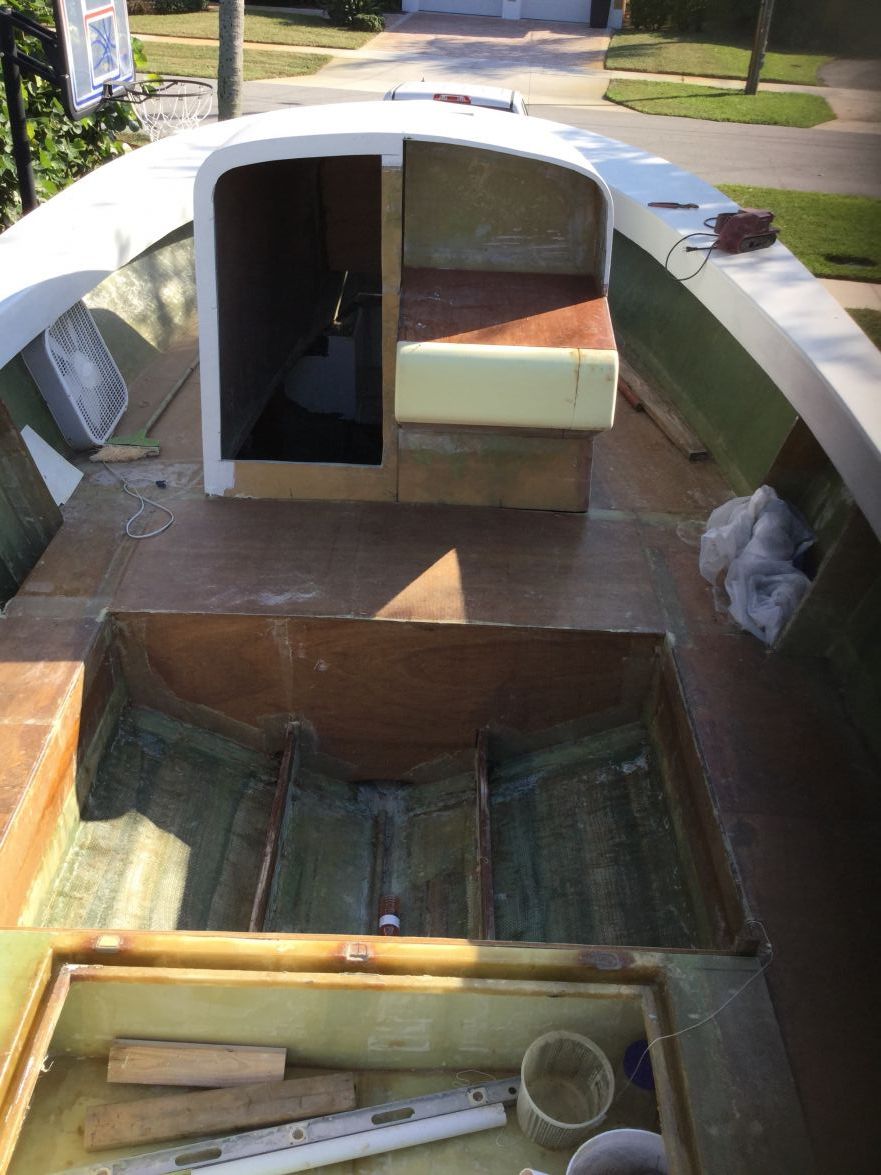

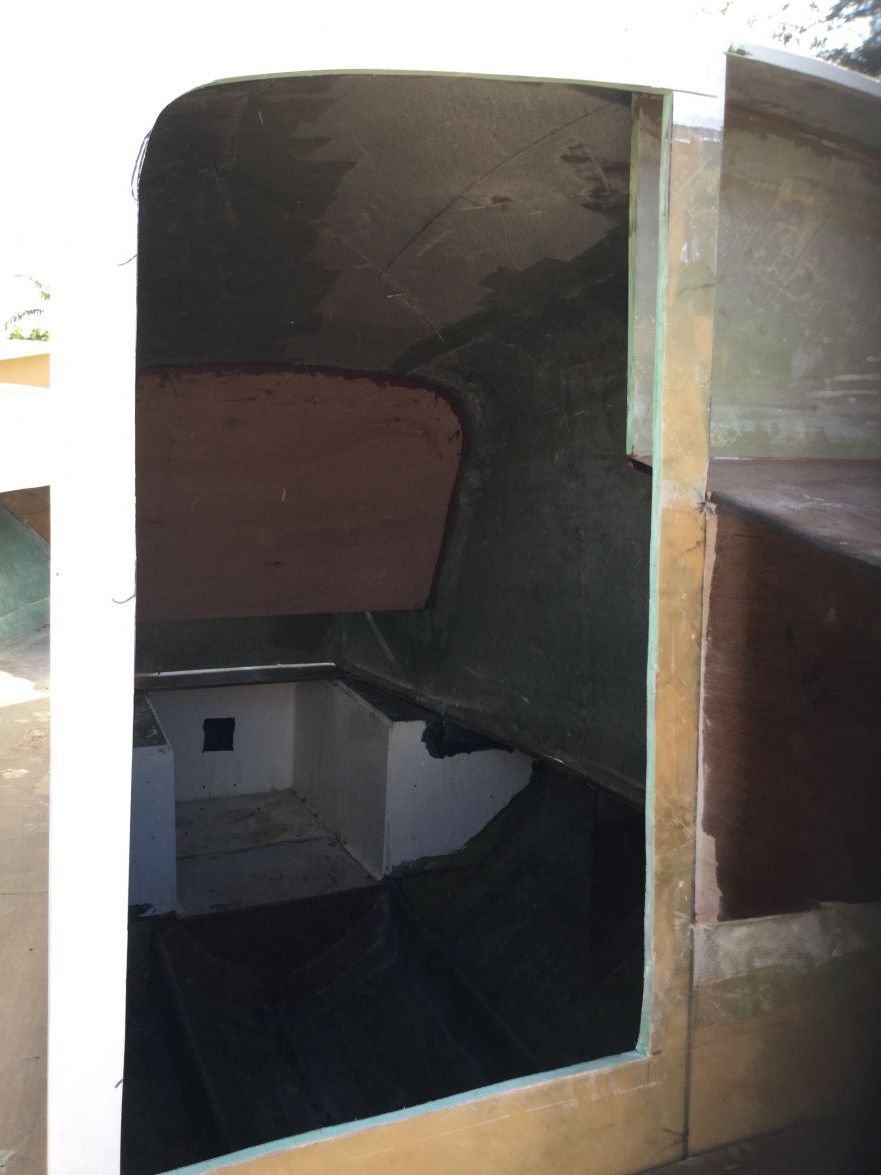
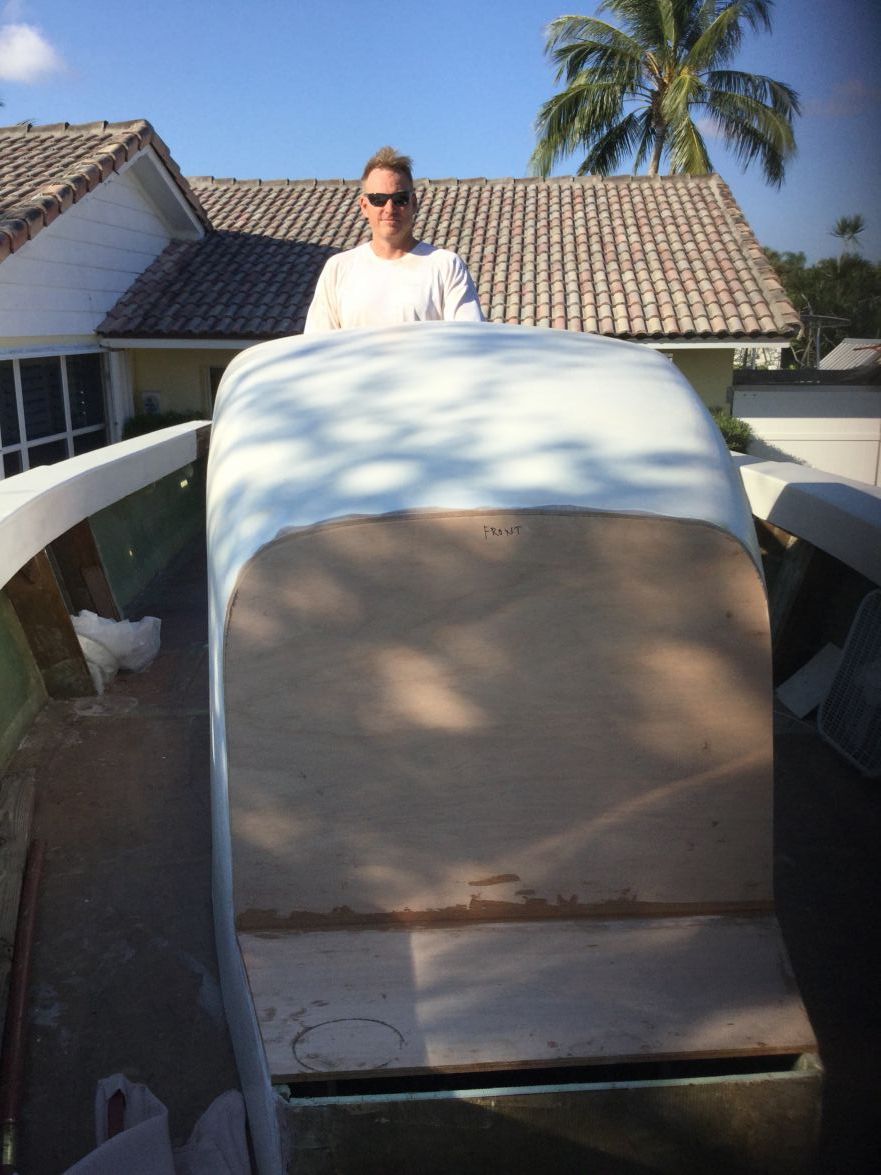
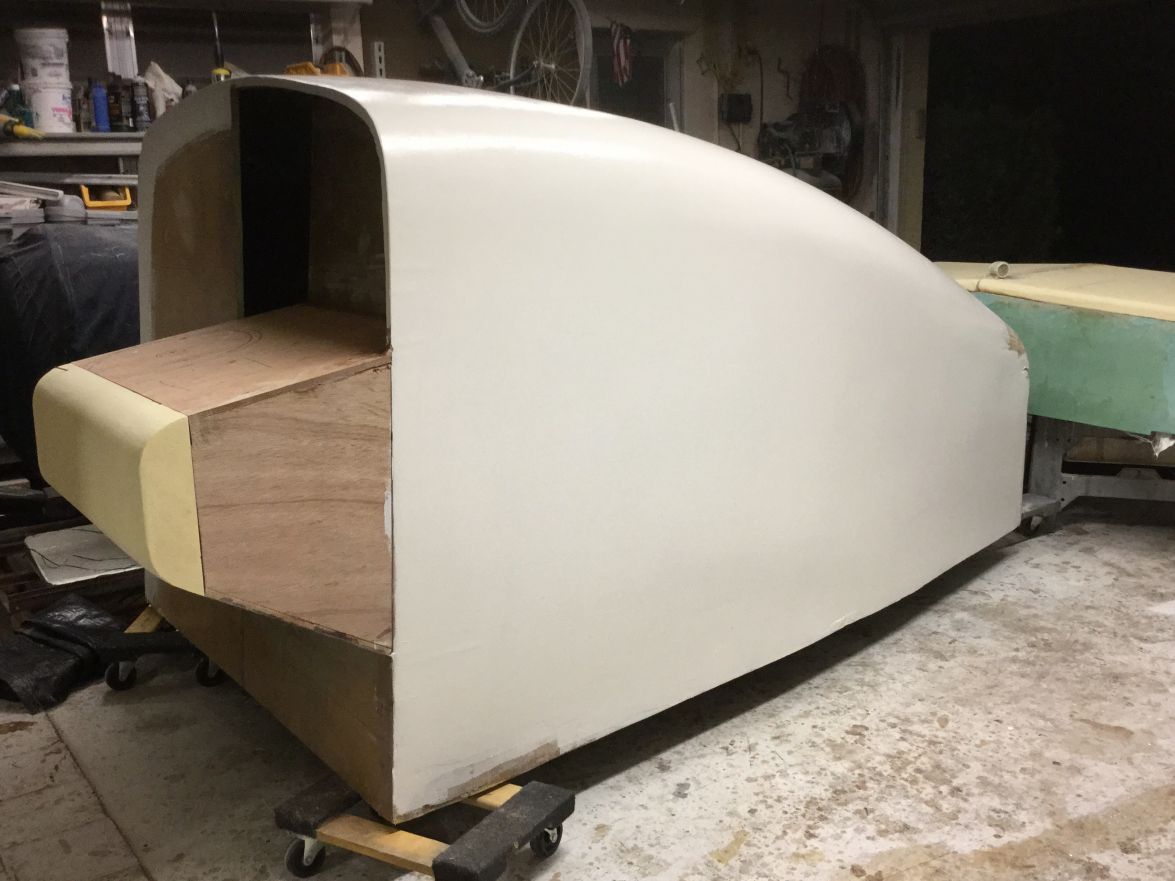
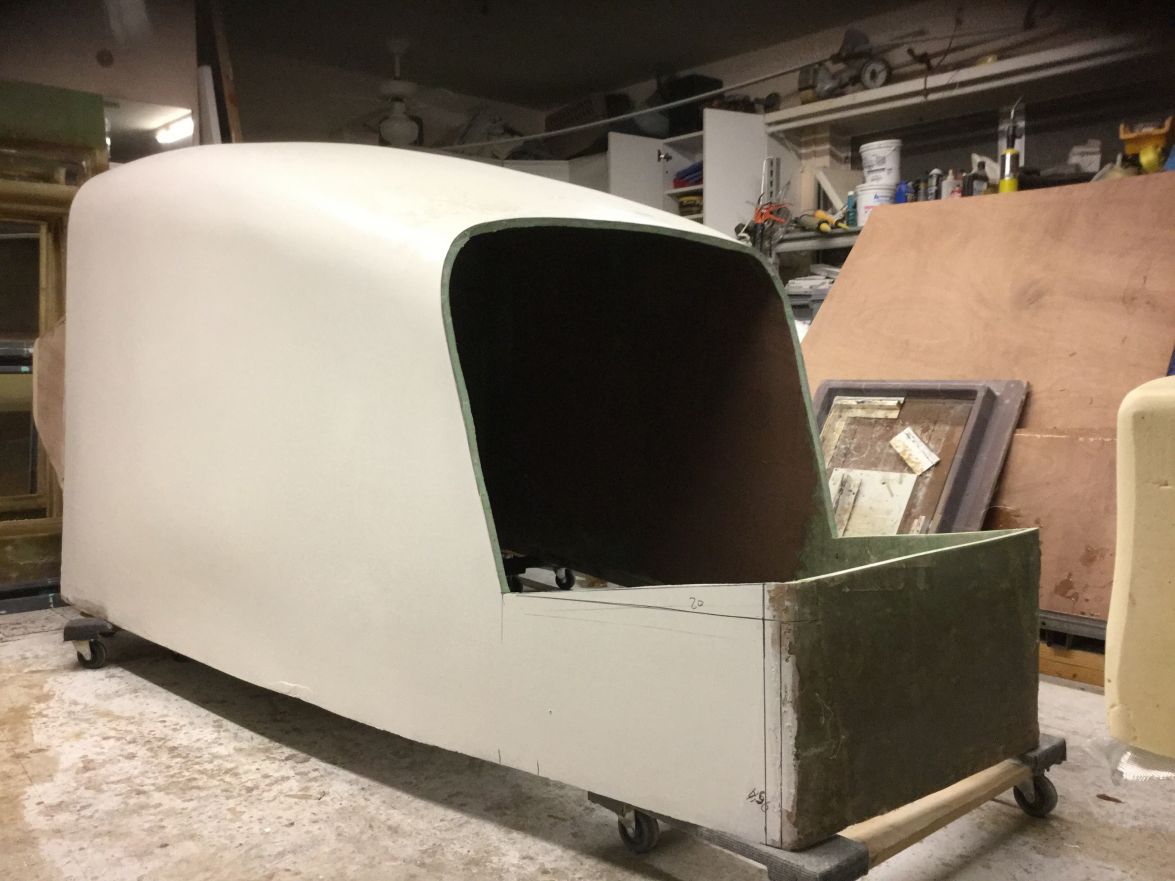
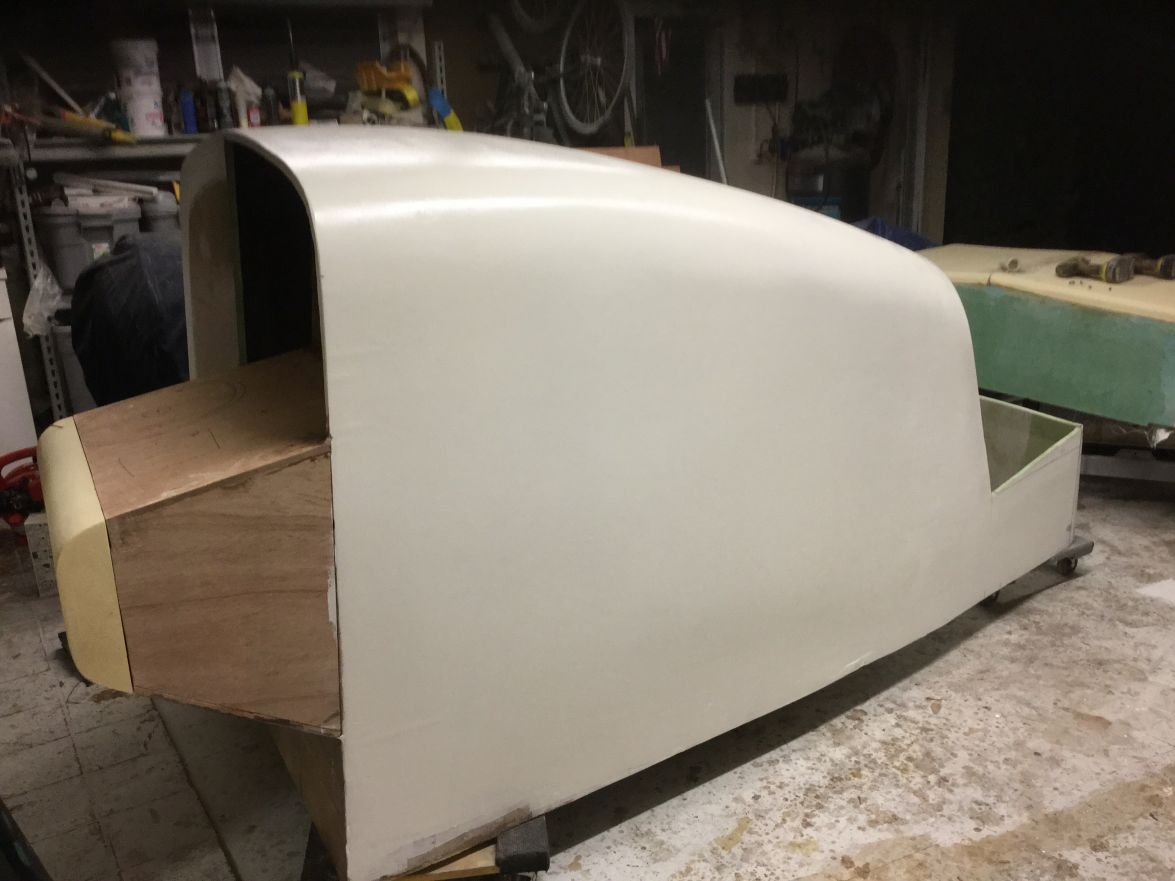
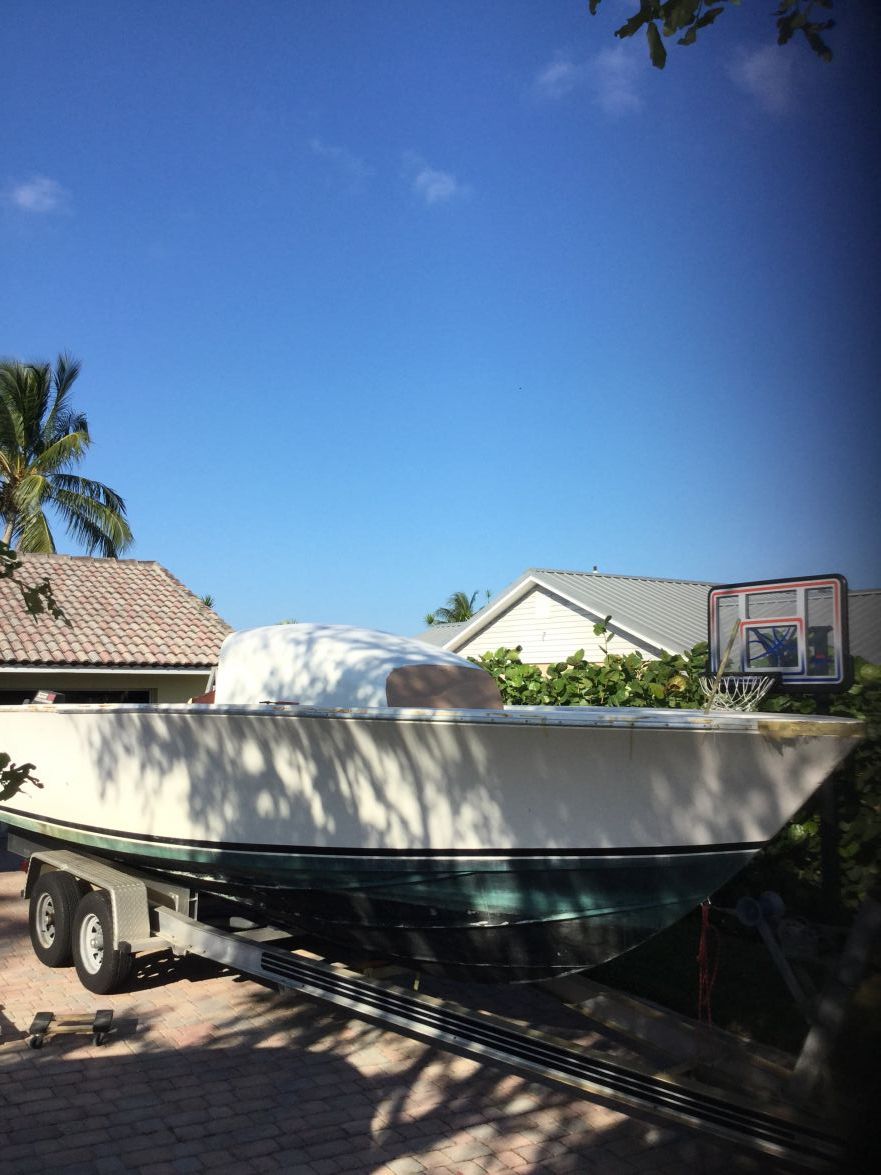
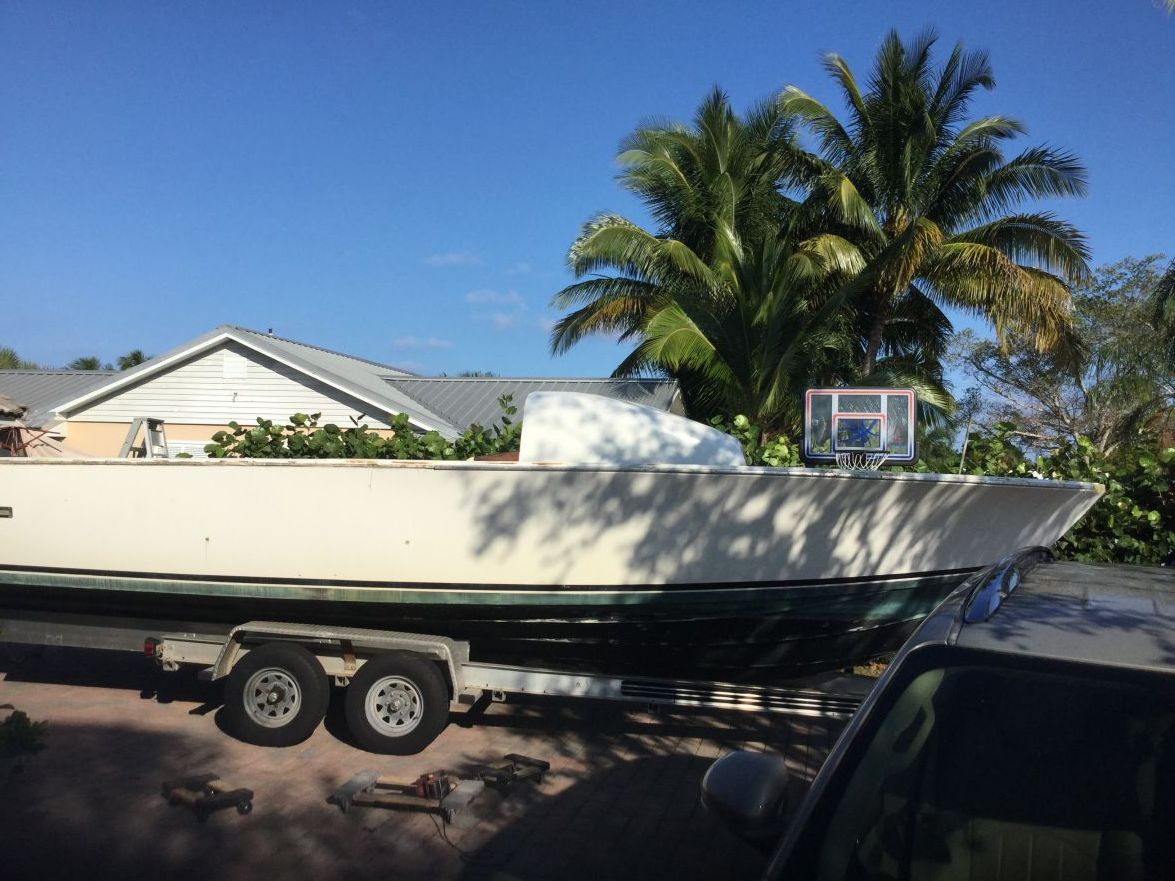
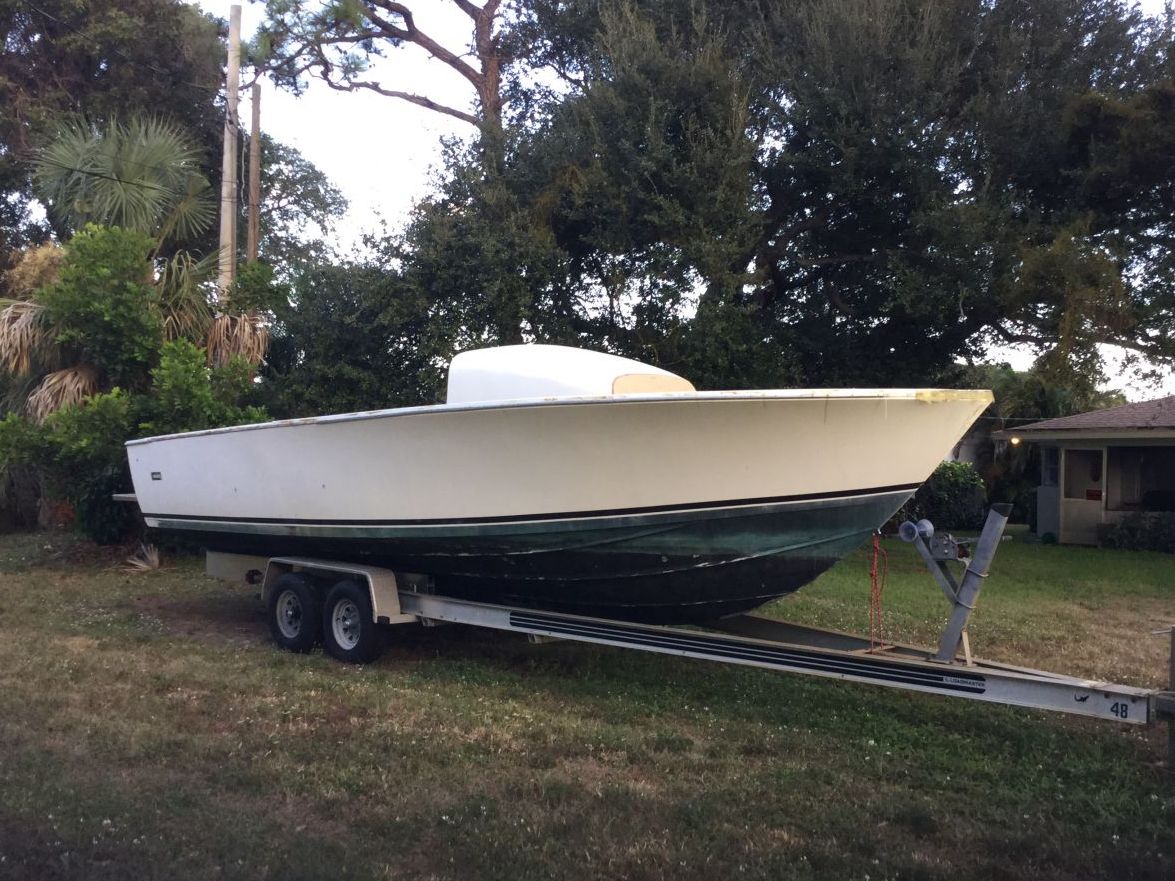
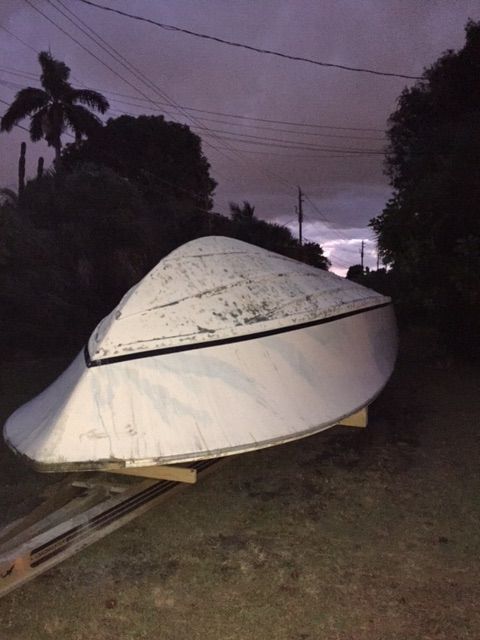
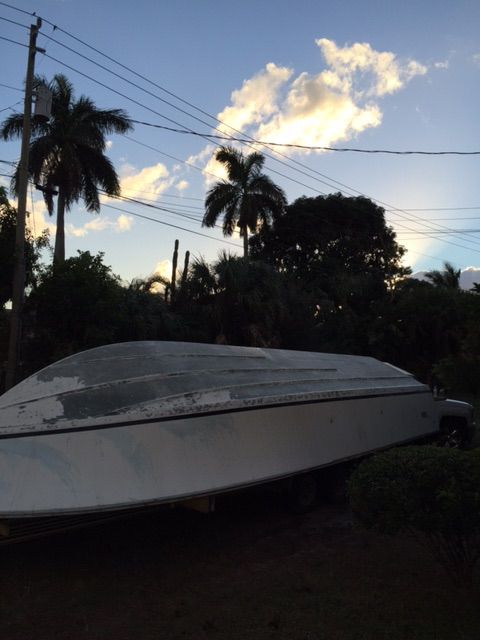
You can see the size relative to me. I am 6'1" if you don't count my hair which is standing straight uo :?
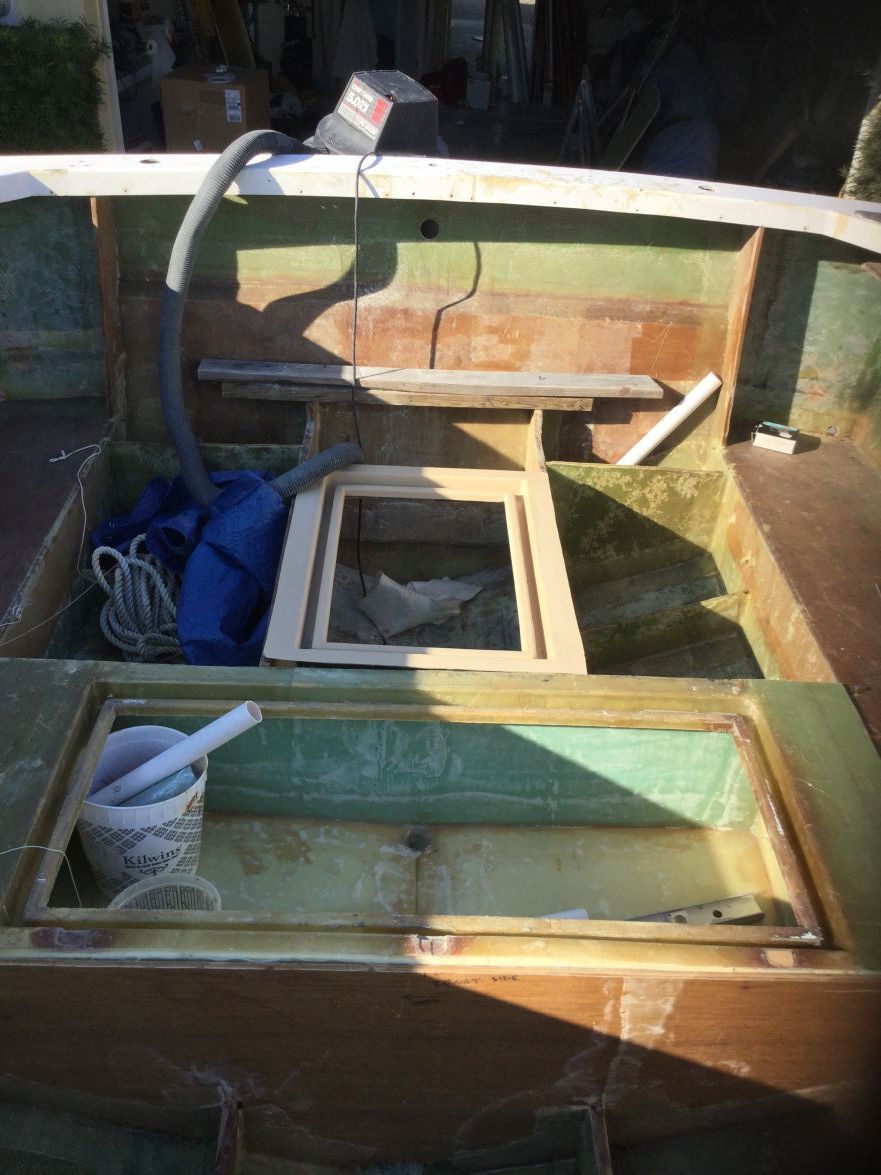
Shot of the fish box.

DAYTRIP- Posts : 133
Join date : 2015-04-14
Re: BERTRAM 28 CENTER CONSOLE CONVERSION
![]() by Admin - Shine Mon Nov 02, 2015 9:18 am
by Admin - Shine Mon Nov 02, 2015 9:18 am
Admin - Shine- Admin
- Posts : 488
Join date : 2015-03-31 -
Re: BERTRAM 28 CENTER CONSOLE CONVERSION
![]() by DAYTRIP Mon Nov 09, 2015 8:50 am
by DAYTRIP Mon Nov 09, 2015 8:50 am
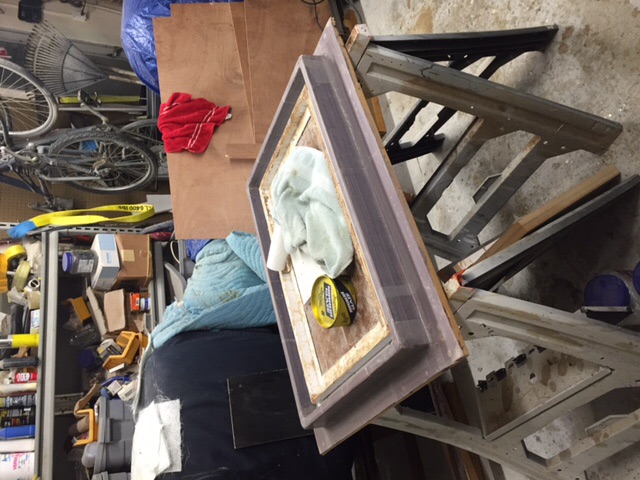
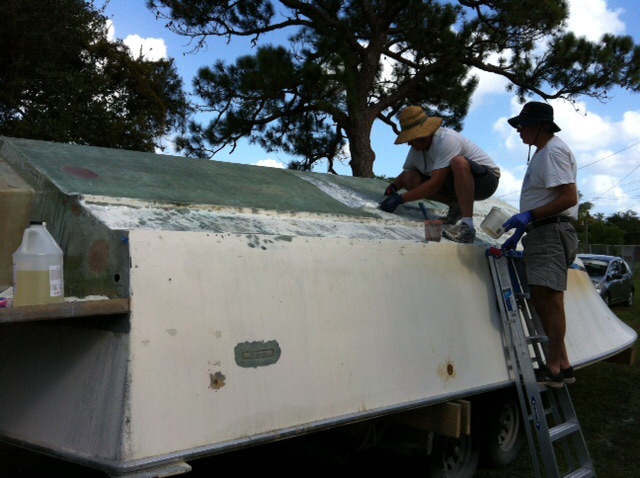
Then I built a part off it to serve as the plug. Notice all the lines created by the tape.
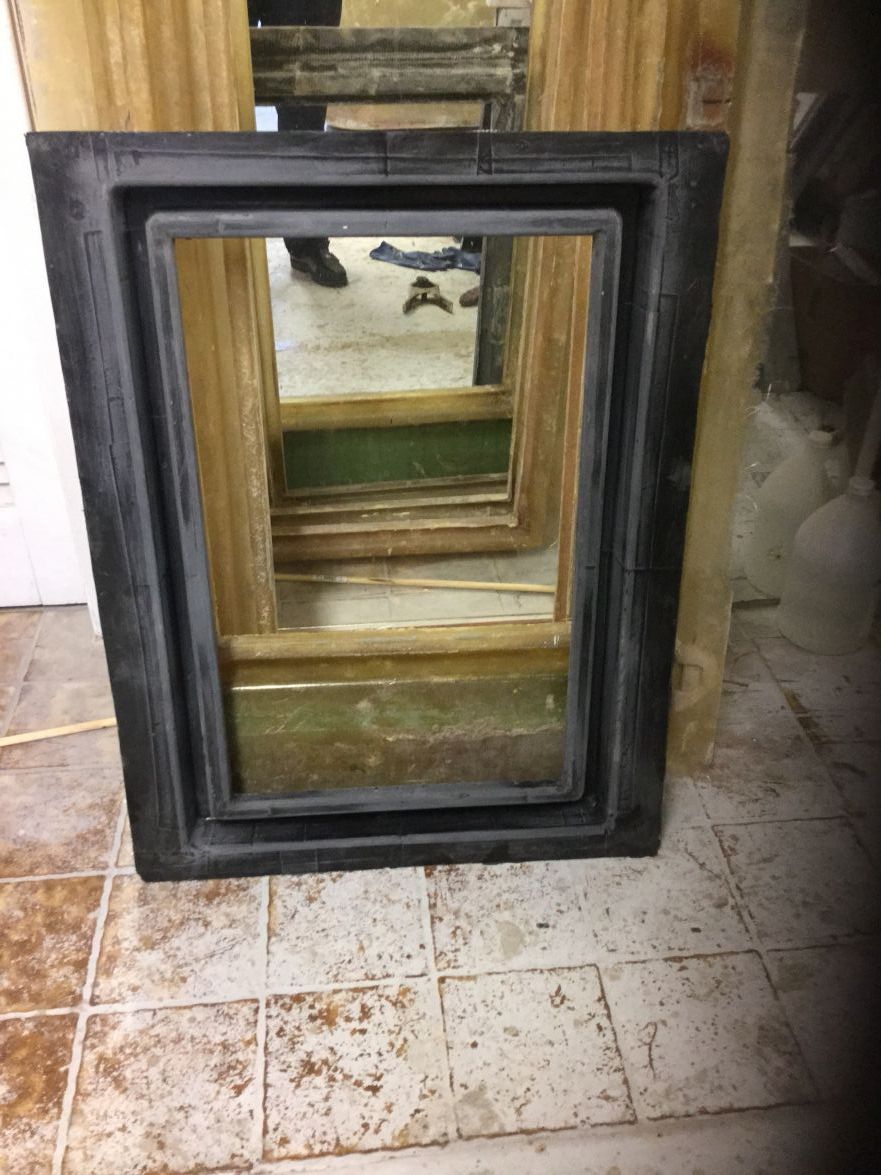
Then I fixed all the imperfections then sprayed with durateck. Nice product for this type of work as it flashes off fast. I used the tan colored stuff. I then sanded with 320 to get it fair. Then used 800, 1200, 1500 wet or dry to get it polished. Then I used rubbing compound to try and get it even better. This is a tough part to do body work on as the gutters are deep and narrow. Hard to spray, fill and sand. I got it as good as possible with the plan I would wet sand the mold. I decided to use PVA to ensure I did not hand the mold up on the plug. Using that pretty much guaranteed some wet sanding and polishing. So then I sprayed tooling gel coat in the mold in three builds about an hour apart. I did use a mil thickness gauge to check my film thickness. I was getting about 8 mils per coat. I cross checked this with a chart that showed coverage/gallon. Once the gel coat kicked for a couple hours after the last coat I started laying it up. I did two skins of 1.5 oz mat. And let it cure overnight. Next day I built up three more layers. I reinforced it with plywood and let it cure.
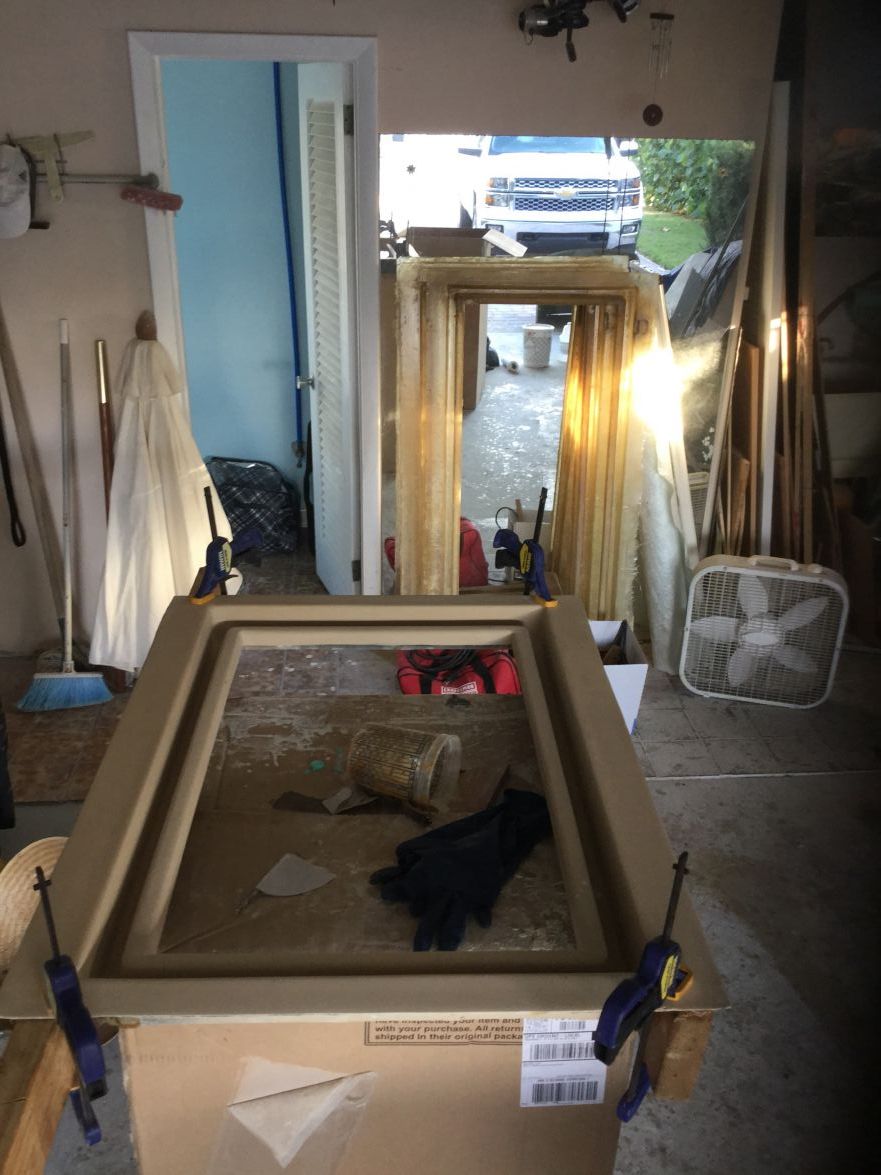
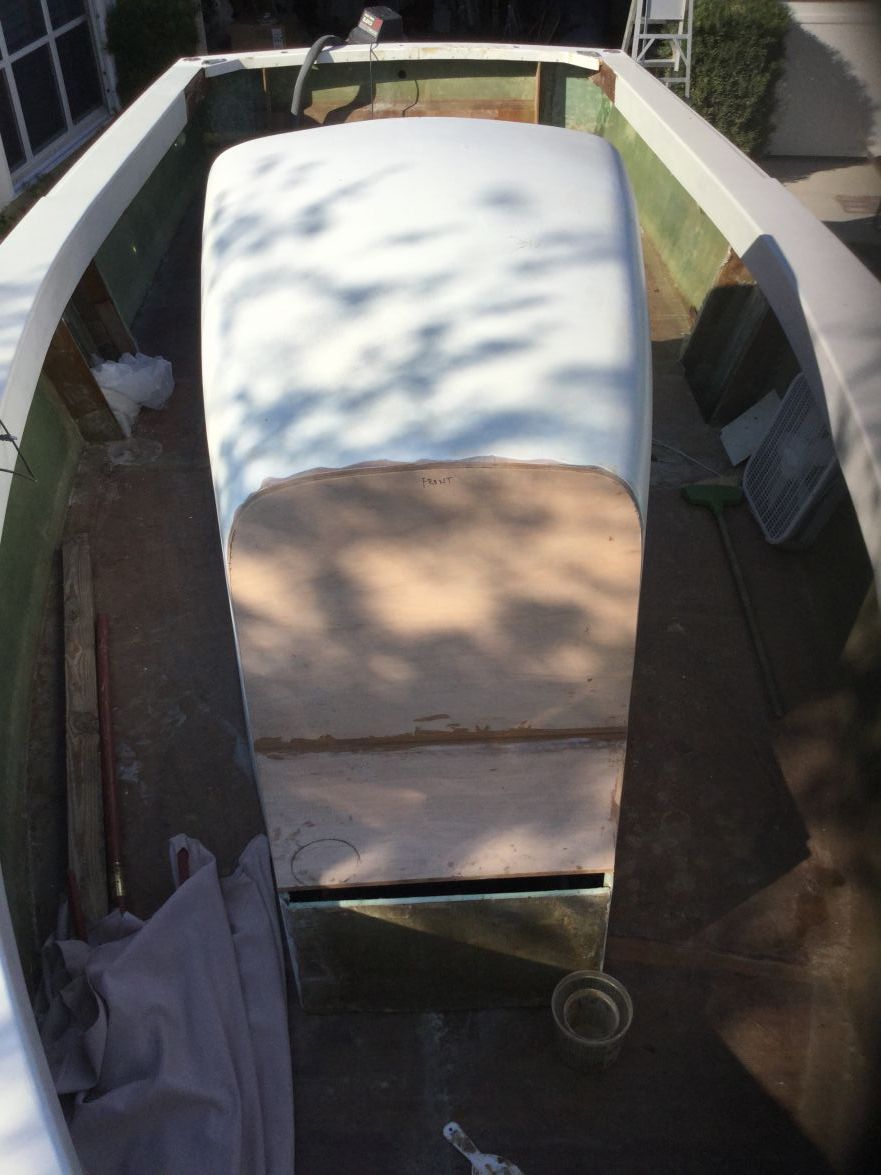
So then I trimmed it and pulled it apart. Used wood shims to start and separate it then continued to work it apart. This is the un-finished product. Need to wet sand and buff.

A note on the PVA. I read a lot about molds or the first few parts sticking. From what I learned the gel coat has some free on linked polymers that exist until to mold is used two or three times. Wax will not always create a barrier between the new gel coat and the gel coat on the part but PVA will. So using PVA the first few times is safest way to prevent a stuck part. That, like everything else, is one theory/recommended proceedure.
DAYTRIP- Posts : 133
Join date : 2015-04-14
Re: BERTRAM 28 CENTER CONSOLE CONVERSION
![]() by Admin - Shine Mon Nov 09, 2015 7:34 pm
by Admin - Shine Mon Nov 09, 2015 7:34 pm
Joel
Admin - Shine- Admin
- Posts : 488
Join date : 2015-03-31 -
Re: BERTRAM 28 CENTER CONSOLE CONVERSION
![]() by DAYTRIP Mon Nov 09, 2015 9:13 pm
by DAYTRIP Mon Nov 09, 2015 9:13 pm
DAYTRIP- Posts : 133
Join date : 2015-04-14
Re: BERTRAM 28 CENTER CONSOLE CONVERSION
![]() by Admin - Shine Tue Nov 10, 2015 9:20 am
by Admin - Shine Tue Nov 10, 2015 9:20 am
DAYTRIP wrote:I did spray it. It is hard to get a good result on these because of the tight deep spaces. I do need to wet sand and buff a little. Should be ready for part 1 in a couple of days. Place your order now
I will take one, at least
Admin - Shine- Admin
- Posts : 488
Join date : 2015-03-31 -
Re: BERTRAM 28 CENTER CONSOLE CONVERSION
![]() by DAYTRIP Tue Nov 10, 2015 10:20 am
by DAYTRIP Tue Nov 10, 2015 10:20 am
DAYTRIP- Posts : 133
Join date : 2015-04-14
Re: BERTRAM 28 CENTER CONSOLE CONVERSION
![]() by DAYTRIP Wed Nov 11, 2015 8:20 pm
by DAYTRIP Wed Nov 11, 2015 8:20 pm
DAYTRIP- Posts : 133
Join date : 2015-04-14
Re: BERTRAM 28 CENTER CONSOLE CONVERSION
![]() by DAYTRIP Mon Nov 23, 2015 6:15 pm
by DAYTRIP Mon Nov 23, 2015 6:15 pm

DAYTRIP- Posts : 133
Join date : 2015-04-14
Re: BERTRAM 28 CENTER CONSOLE CONVERSION
![]() by DAYTRIP Wed Nov 25, 2015 6:17 pm
by DAYTRIP Wed Nov 25, 2015 6:17 pm
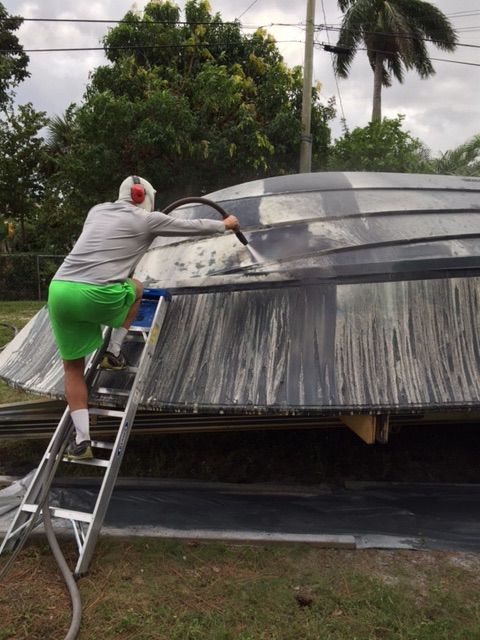
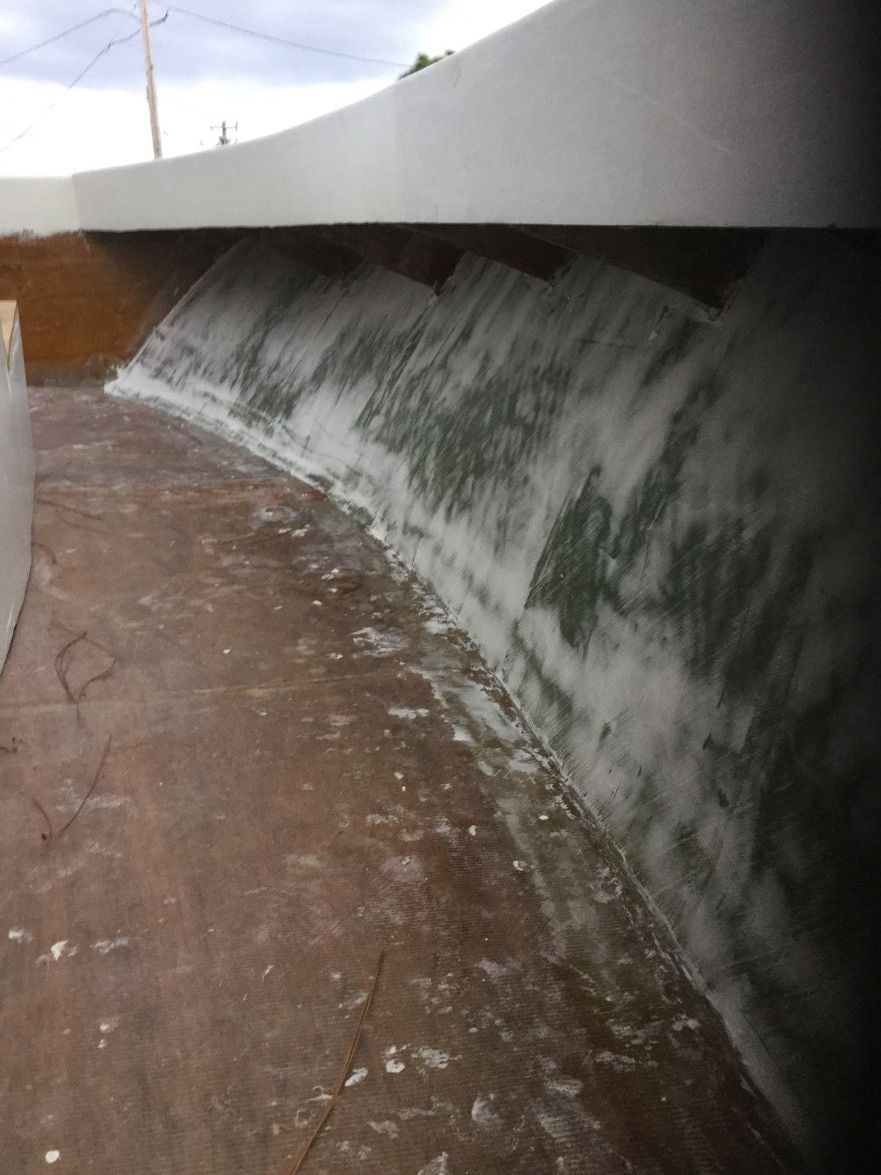
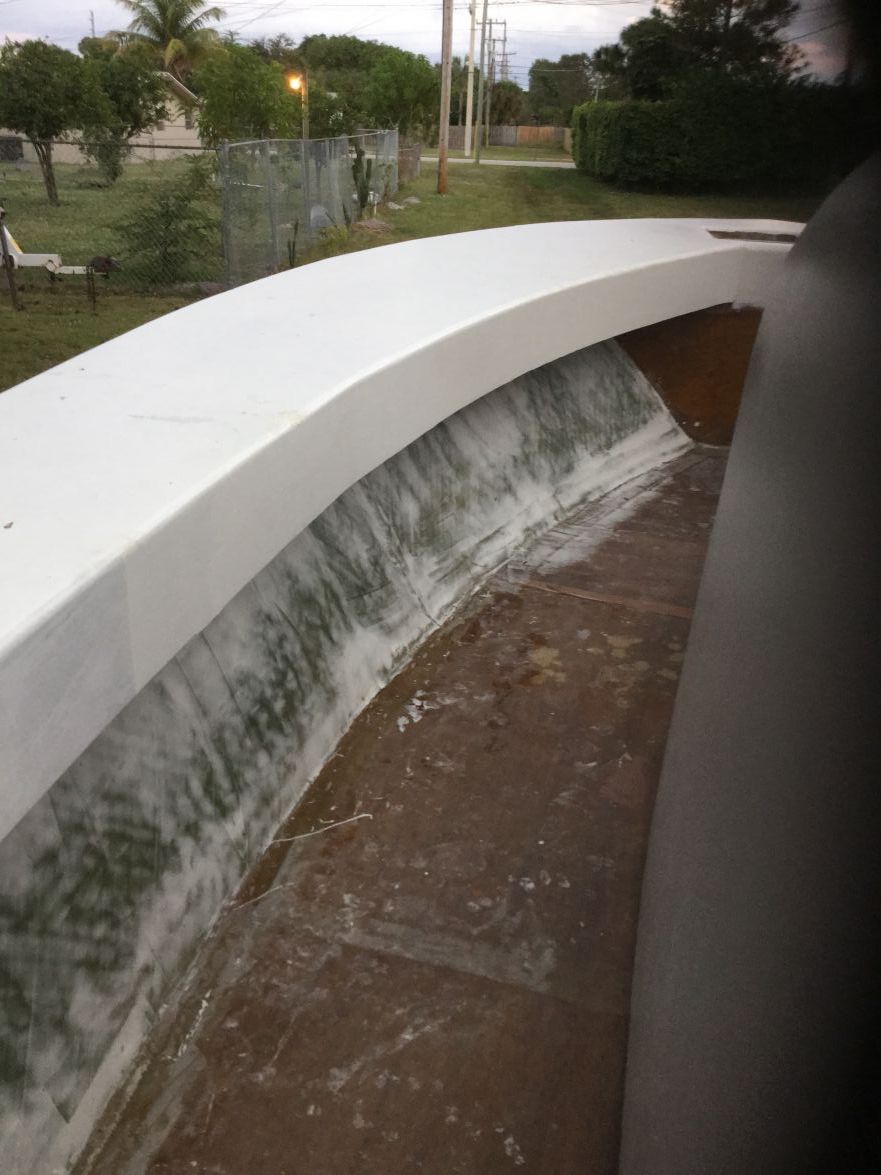
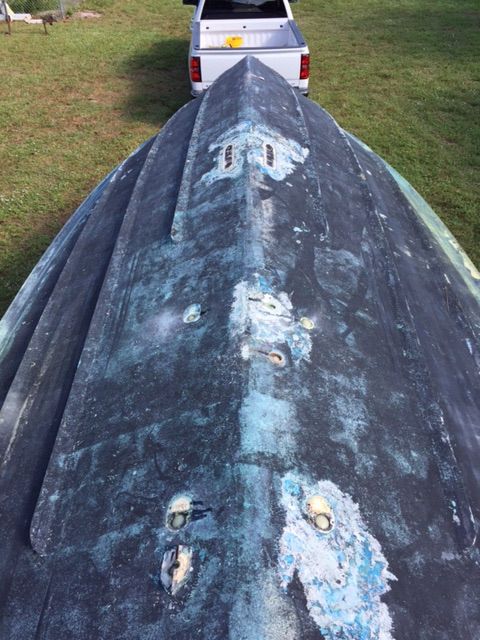
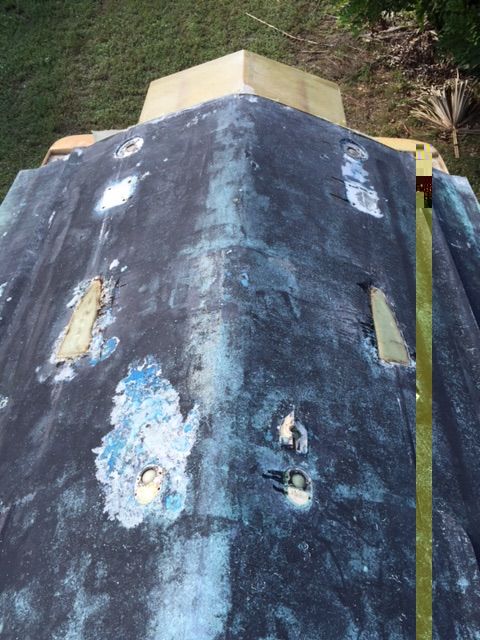
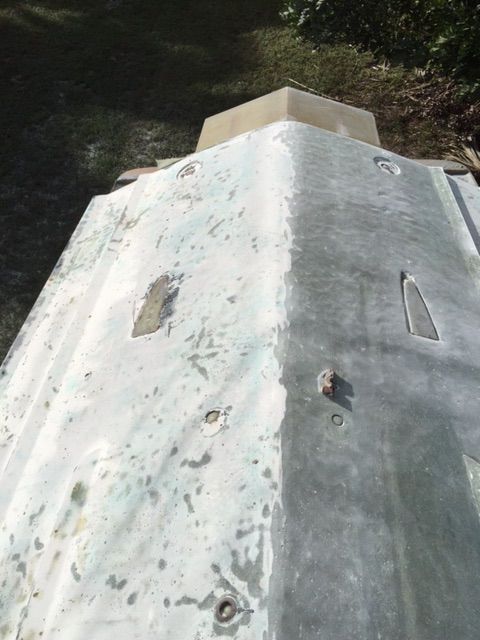
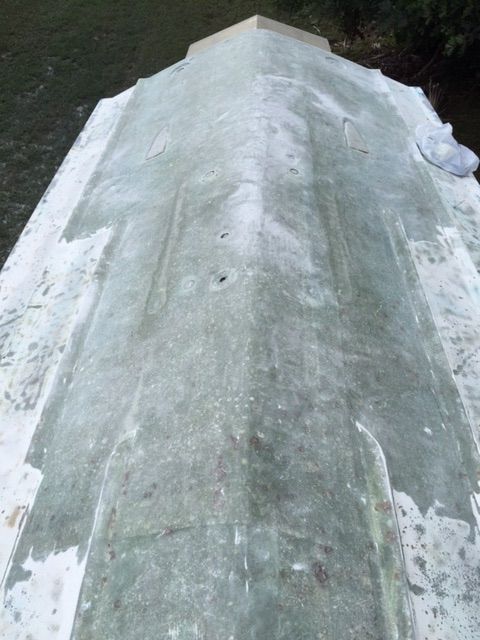
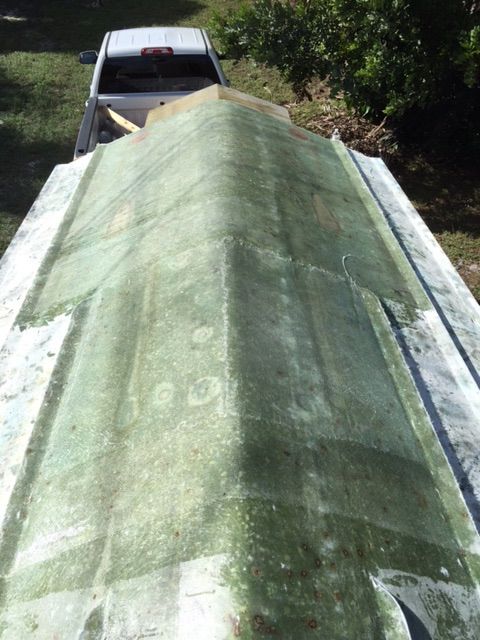
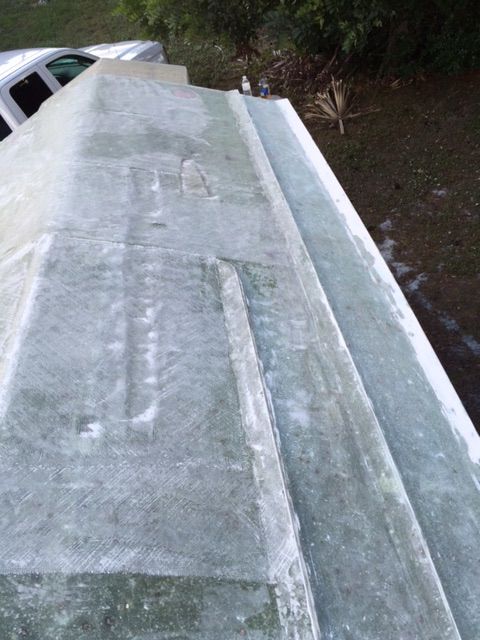
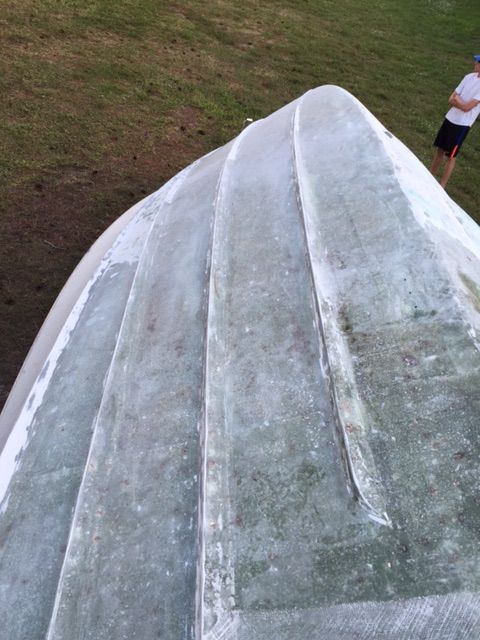
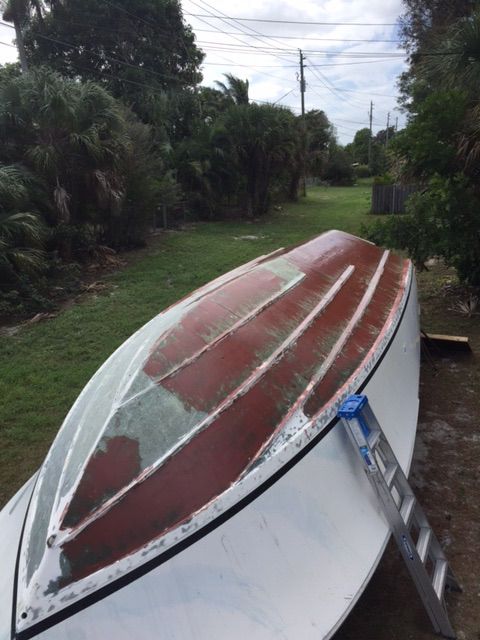
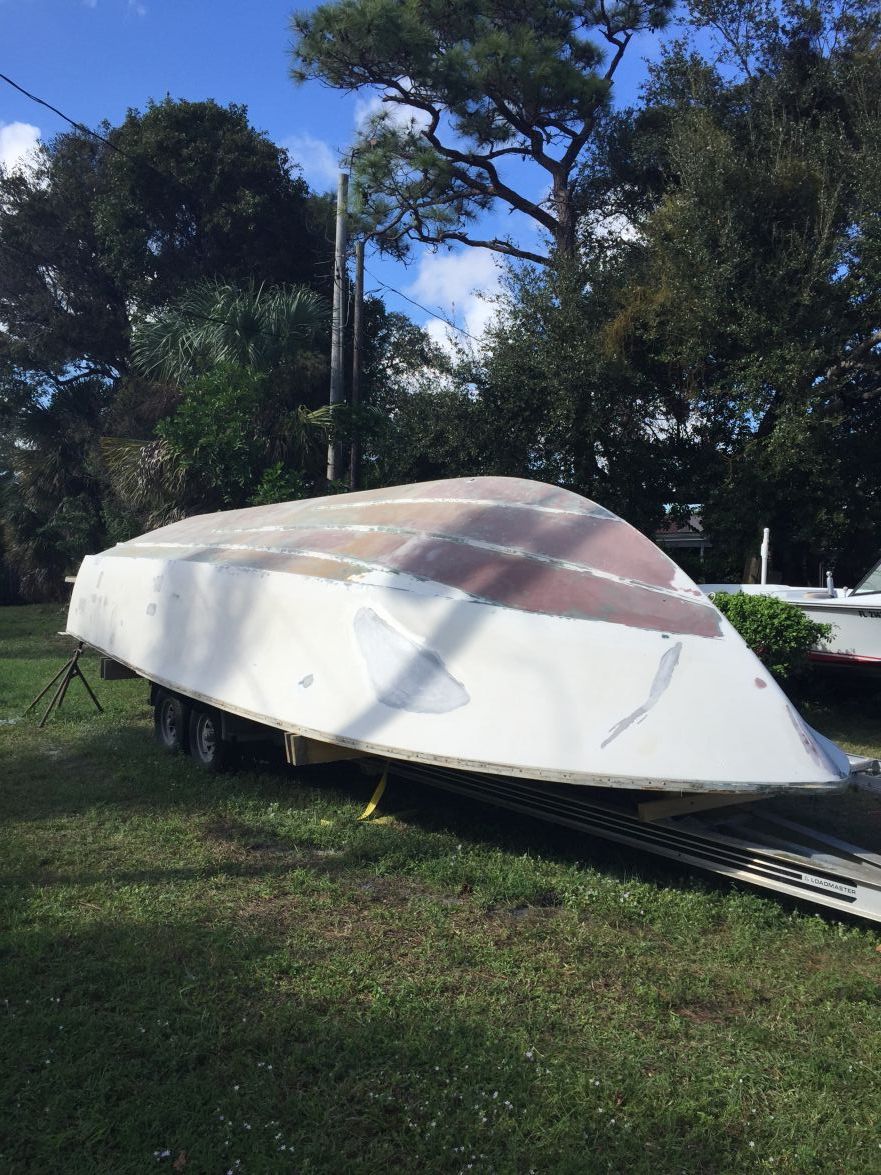
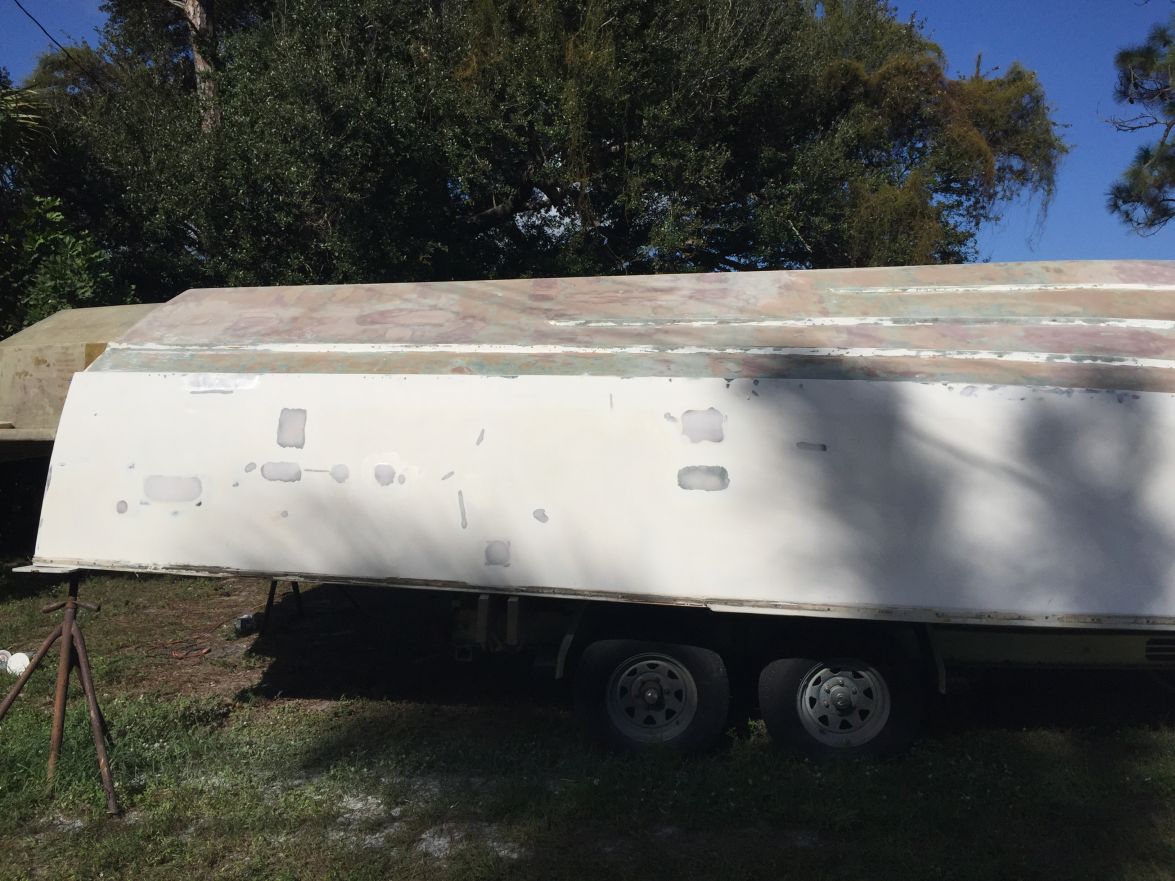
Today I checked out the blasted bottom. Found what I originally had planned on but not hoped for. Gel coat full of little blisters about the size of a dime at most. Almost like air between gel coat and mat. So I am grinding it off. I think by the time I play around filling the tons of hole I wil be ahead, and have a much better product if I get to glass and then float coat it with epoxy and filler. The aft section that is ground now will get glass as there are many old thru hulls to go over. I glassed them from the inside already so I plan to fill the voids with epoxy and milled fibers then glass over top. The first shot is the left side of the photo ground and the right as is. The bottom is ground both sides. If you look you will see two liner areas that I went down to the roving. These are the stringers lines in the engine area. Stress cracks in the gel coat and the mat. Nothing in the roving. So I will add extra their to build back up. Also did the same thing in the area of the strut pads. They were ok but figured I would make sure.
Let me tell you that flipping a hull over to work on the bottom is the best thing you can do as far as efficiency. I ground that area off in 2 hours. It would be 6 if you were doing it overhead I bet.
DAYTRIP- Posts : 133
Join date : 2015-04-14
Re: BERTRAM 28 CENTER CONSOLE CONVERSION
![]() by DAYTRIP Thu Nov 26, 2015 2:09 pm
by DAYTRIP Thu Nov 26, 2015 2:09 pm
DAYTRIP- Posts : 133
Join date : 2015-04-14
Re: BERTRAM 28 CENTER CONSOLE CONVERSION
![]() by DAYTRIP Sun Nov 29, 2015 6:45 pm
by DAYTRIP Sun Nov 29, 2015 6:45 pm
DAYTRIP- Posts : 133
Join date : 2015-04-14
Re: BERTRAM 28 CENTER CONSOLE CONVERSION
![]() by Admin - Shine Mon Nov 30, 2015 12:16 pm
by Admin - Shine Mon Nov 30, 2015 12:16 pm
Admin - Shine- Admin
- Posts : 488
Join date : 2015-03-31 -
Re: BERTRAM 28 CENTER CONSOLE CONVERSION
![]() by Admin - Shine Tue Dec 08, 2015 2:55 pm
by Admin - Shine Tue Dec 08, 2015 2:55 pm
Admin - Shine- Admin
- Posts : 488
Join date : 2015-03-31 -
Re: BERTRAM 28 CENTER CONSOLE CONVERSION
![]() by DAYTRIP Wed Dec 09, 2015 6:43 pm
by DAYTRIP Wed Dec 09, 2015 6:43 pm
DAYTRIP- Posts : 133
Join date : 2015-04-14
Re: BERTRAM 28 CENTER CONSOLE CONVERSION
![]() by DAYTRIP Sat Dec 19, 2015 4:43 pm
by DAYTRIP Sat Dec 19, 2015 4:43 pm
DAYTRIP- Posts : 133
Join date : 2015-04-14
Re: BERTRAM 28 CENTER CONSOLE CONVERSION
![]() by Admin - Shine Mon Dec 21, 2015 7:28 am
by Admin - Shine Mon Dec 21, 2015 7:28 am
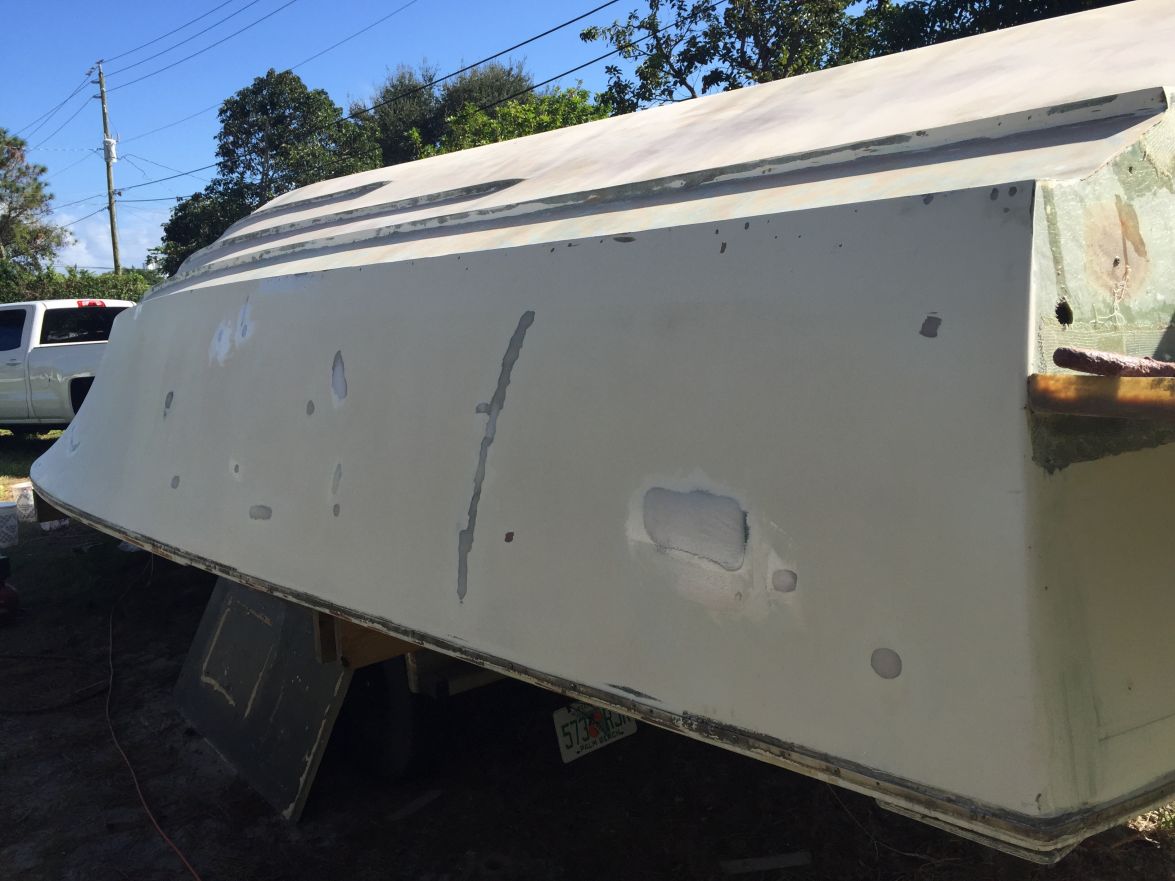
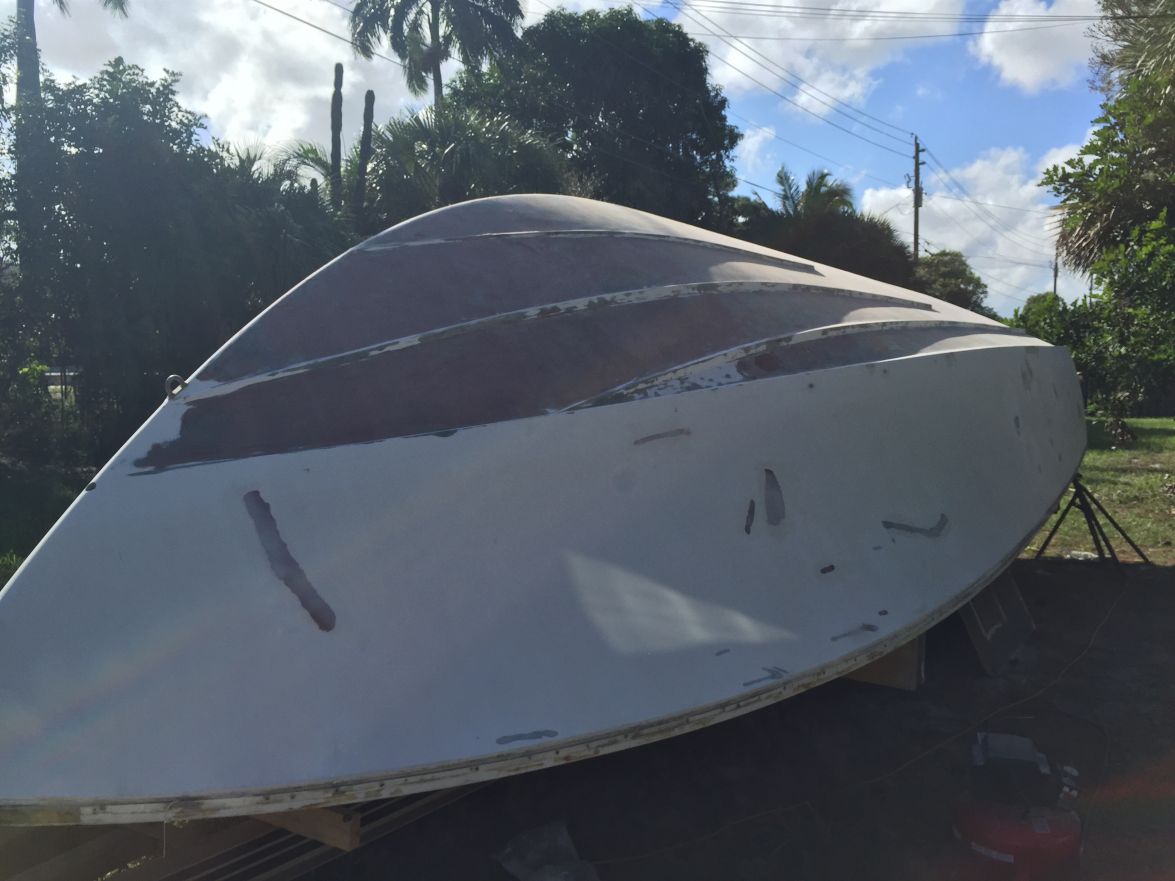
DAYTRIP wrote:Got the balance of the gelcoat off the bottom last weekend and today I did a first fill coat. I have learned multiple thin coats is the best and easiest way to fill and fair. The aft 12' has a new skin of 2 12oz biax so it will take a couple fills. The forward part is just a skim to level the grinder marks. Hope one will do it
Nice, the bottom will be sealed up forever. I can't remember if you are going to paint it while it's upside down?
Admin - Shine- Admin
- Posts : 488
Join date : 2015-03-31 -
Re: BERTRAM 28 CENTER CONSOLE CONVERSION
![]() by DAYTRIP Mon Dec 21, 2015 7:46 am
by DAYTRIP Mon Dec 21, 2015 7:46 am
DAYTRIP- Posts : 133
Join date : 2015-04-14
Re: BERTRAM 28 CENTER CONSOLE CONVERSION
![]() by DAYTRIP Wed Jan 06, 2016 1:24 pm
by DAYTRIP Wed Jan 06, 2016 1:24 pm
DAYTRIP- Posts : 133
Join date : 2015-04-14
Re: BERTRAM 28 CENTER CONSOLE CONVERSION
![]() by DAYTRIP Tue Jan 12, 2016 1:56 pm
by DAYTRIP Tue Jan 12, 2016 1:56 pm

GAP TOWER


DAYTRIP- Posts : 133
Join date : 2015-04-14
Page 4 of 5 • 1, 2, 3, 4, 5 ![]()
» EMC questions - bertram moppie 20
» 23' Sceptre to CC Conversion
» Recommended materials for console build